Showing posts with label ceeway. Show all posts

Wednesday, 16 April 2014

Fork it

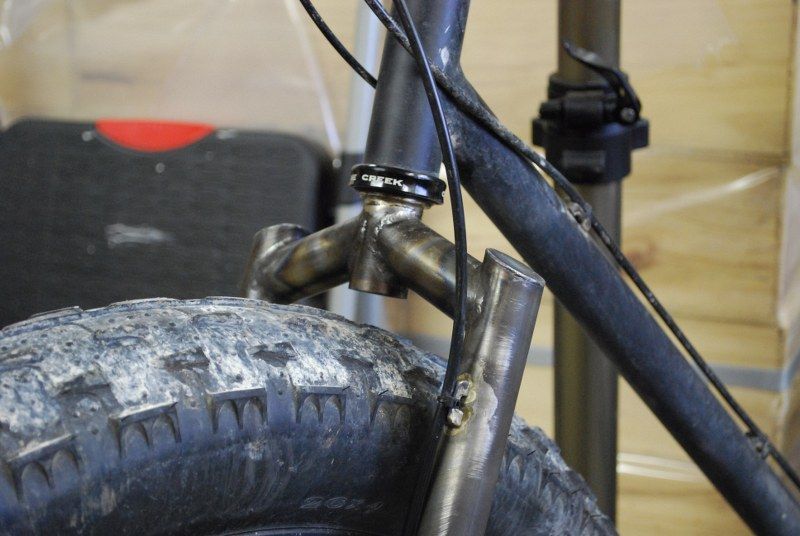
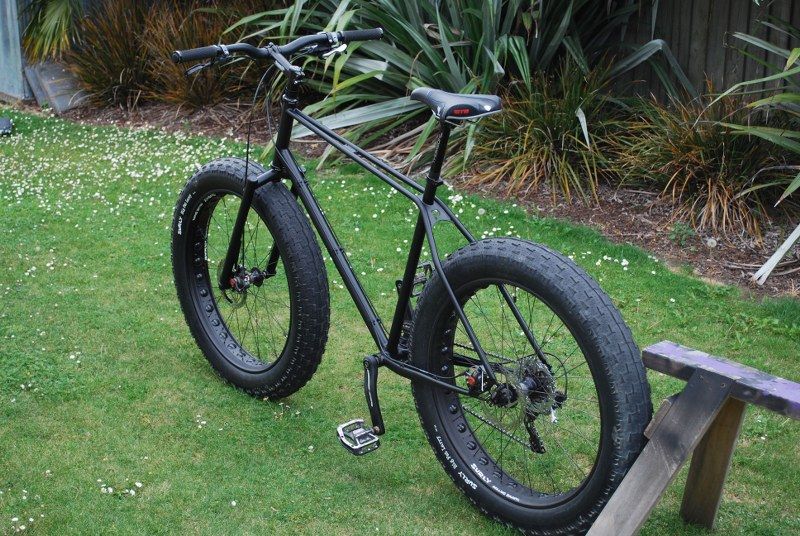
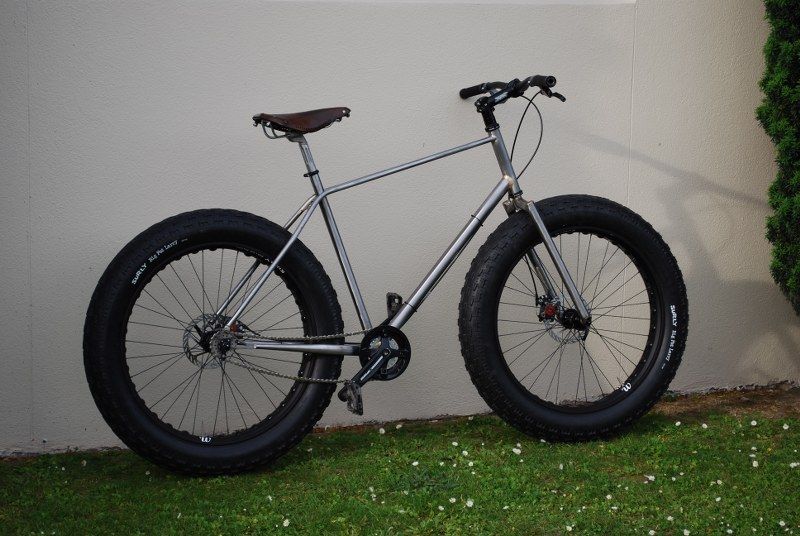
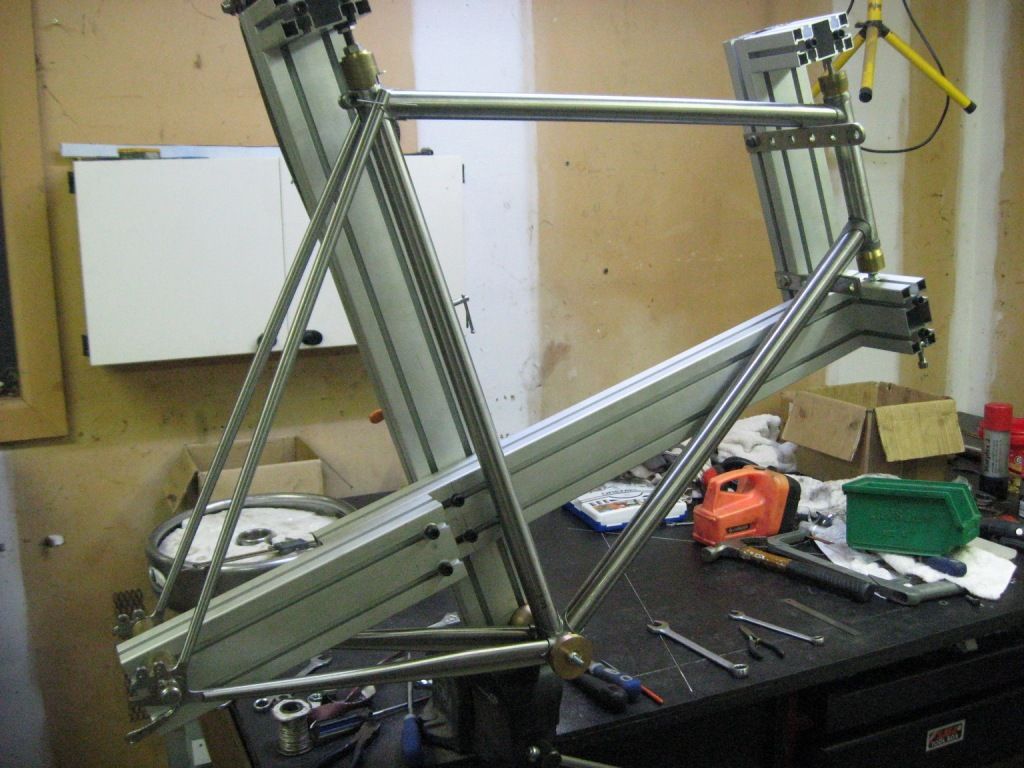
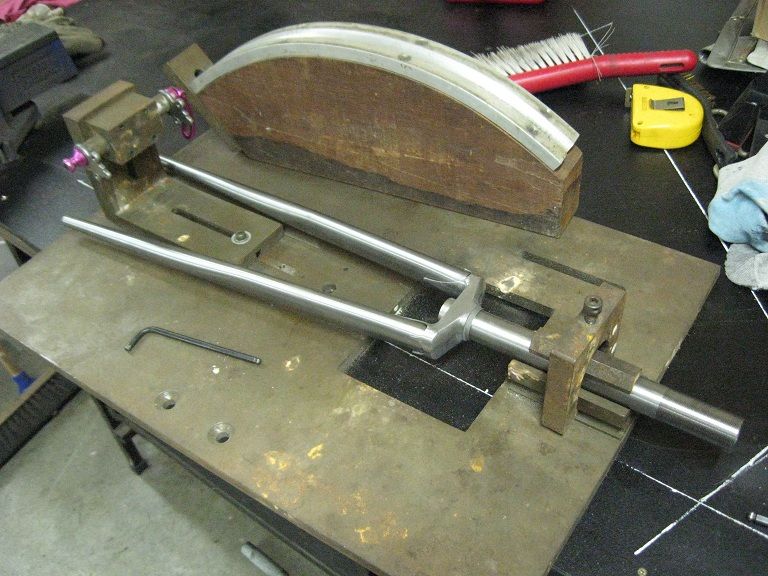
I may have mentioned that I was not 100% happy with the forks on the Fatness, the biggest issue being the steerer tube flexing quite disconcertingly under load. This was because I used straight gauge 4130 where I should have used a proper butted tube. Various tiresome things have got in the way of doing anything about it, but now things have progressed.

One of the issues preventing progress is that I was really quite unhappy with where my TIG welding skills were at. I started the new forks a few weeks ago, but the welding of the crown parts to the steerer was frankly terrible, with lots of bubbles and voids and large chunks of tungsten thrown into the mix. I could TIG weld once upon a time, so why couldn't I do it now? This stalled things because I want 100% confidence in something as stressed as a fork and I fell into framebuilders funk.

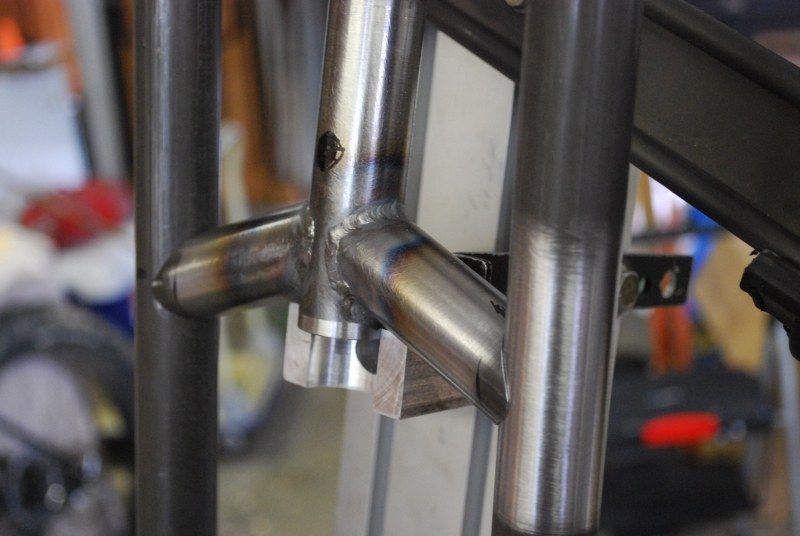
As it happened I had ordered enough parts for two sets of forks, so a few days ago I decided to start in fresh on the second set. I did a few trial welds with the same issues, then decided to swap the tungsten from the recommended thoriated type to a ceriated one that came with the machine. What a difference! It was like coming home and settling in front of the fire with a hot toddy. And so I cracked on with super renewed enthusiasm. The skill is still not at the level it was when I did it for a job, but it is way, way nicer than it was.

Mitering in the fork tubes
Some slightly better then previous welds, yesterday. The next ones were much better than this.
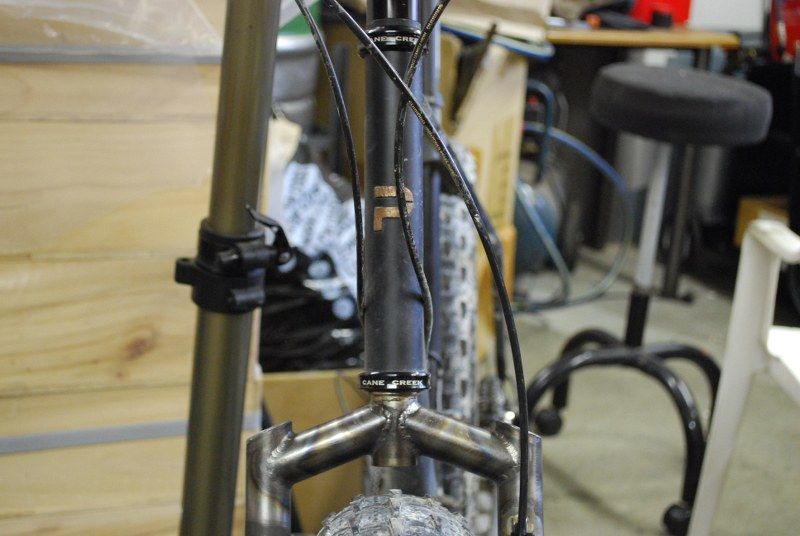
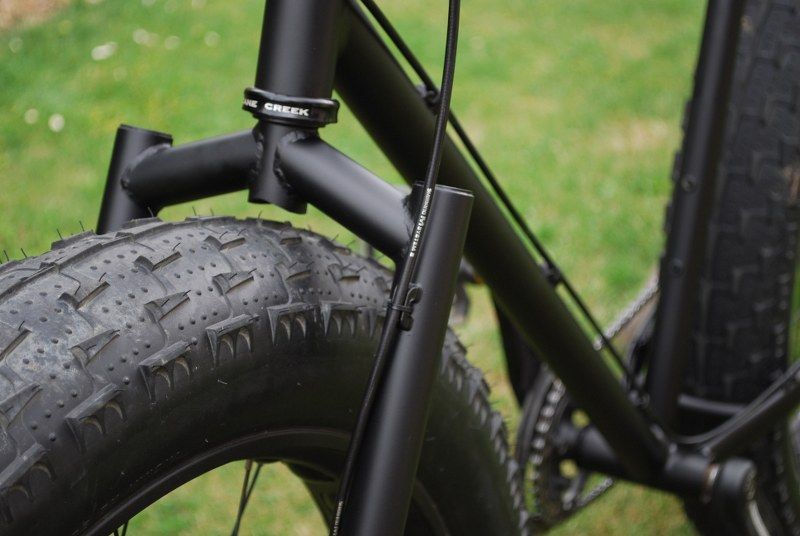
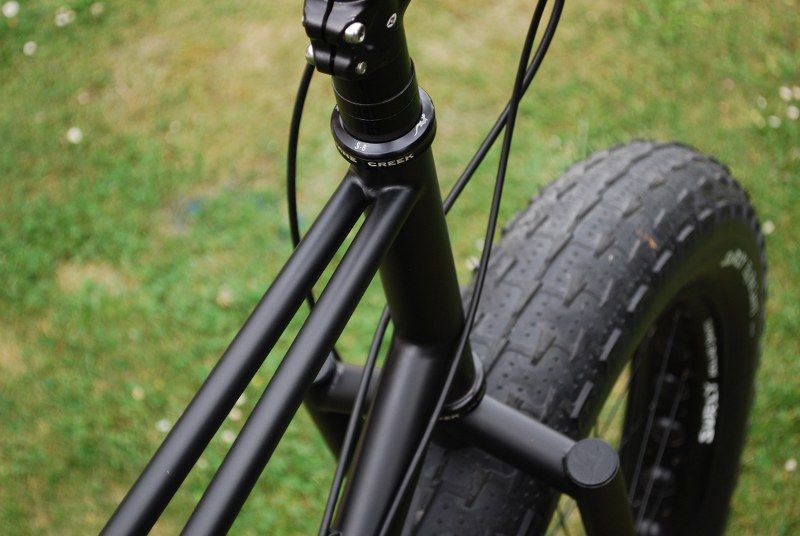
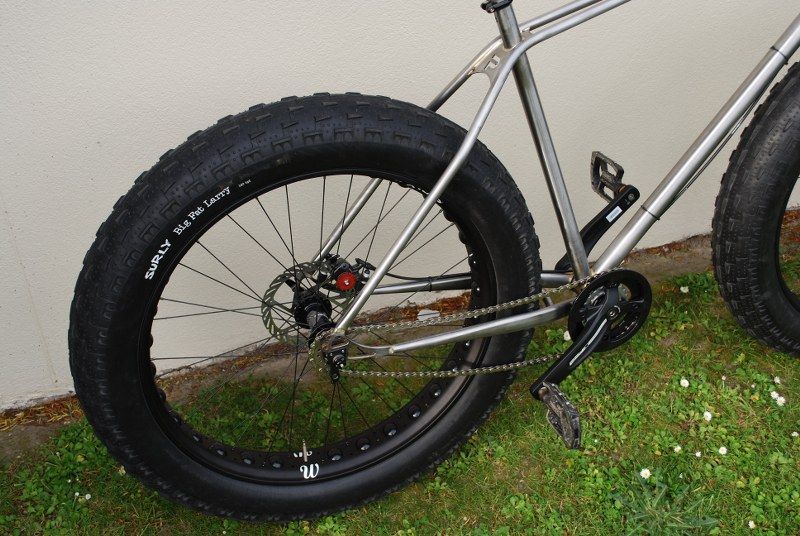
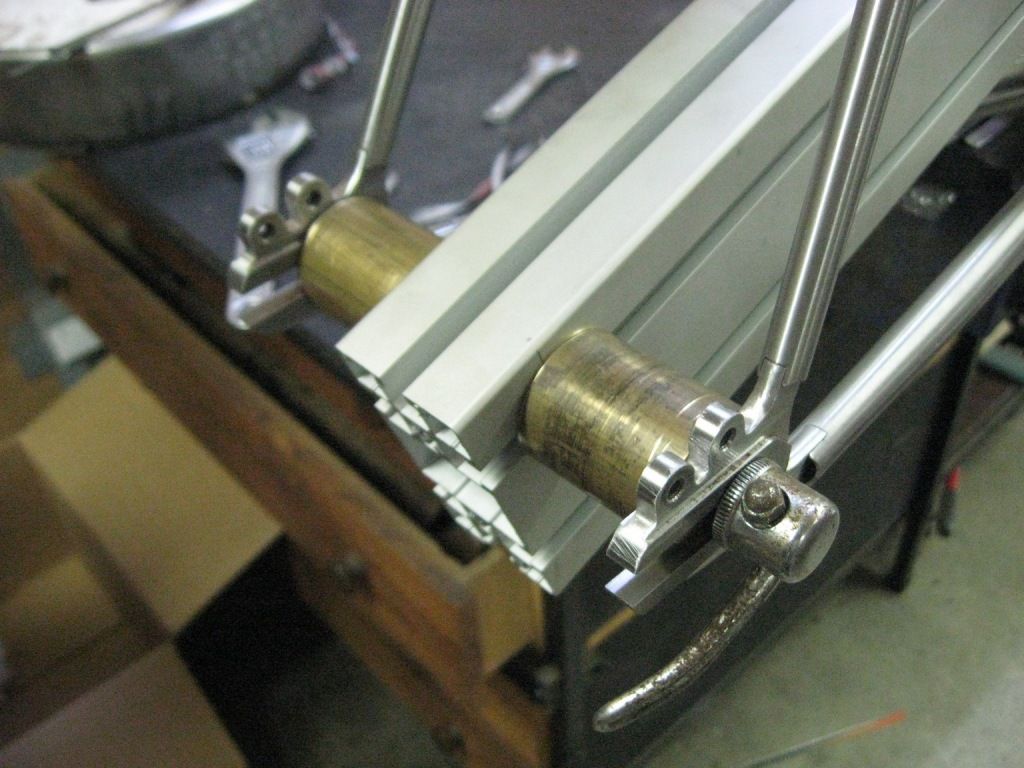
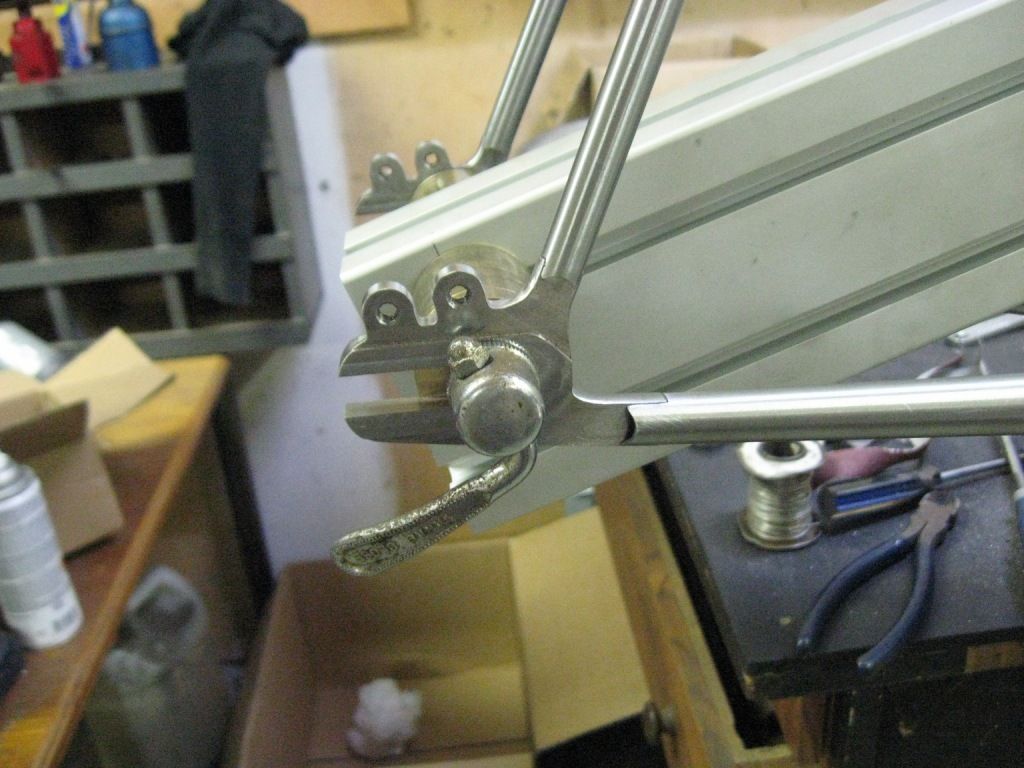
All fitted up. I changed the design detailing a bit, the fork tubes are closer to each other for a start, this was defined by the Ceeway sourced plug in dropouts I used.
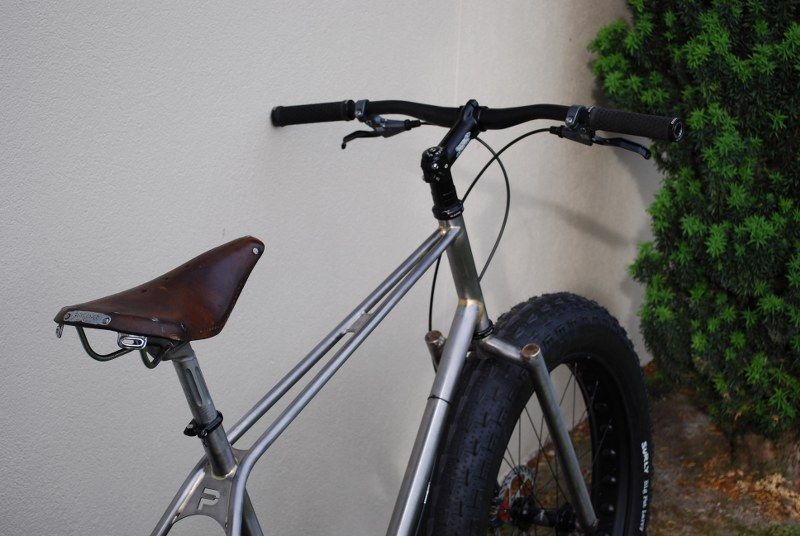
The fork is also taller to give a bit more vertical clearance. This slightly slackens the headtube angle, and I took a 10mm spacer out of the stem stack to drop it back to the previous height.
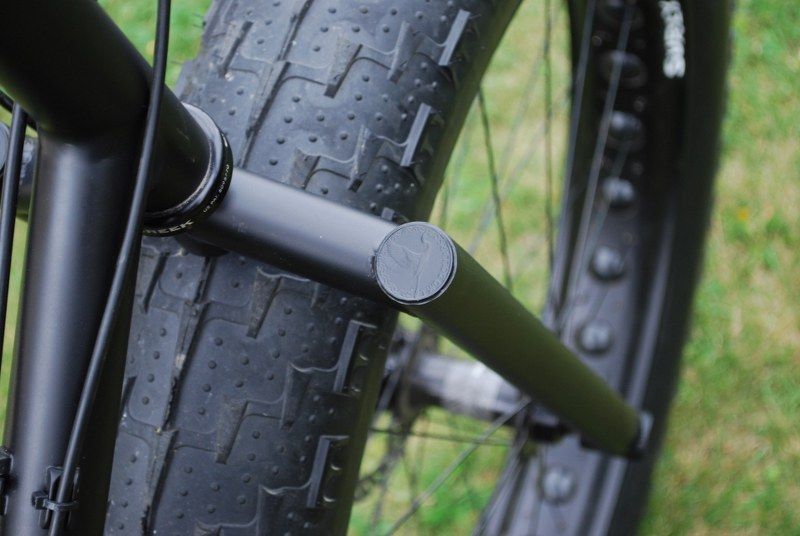
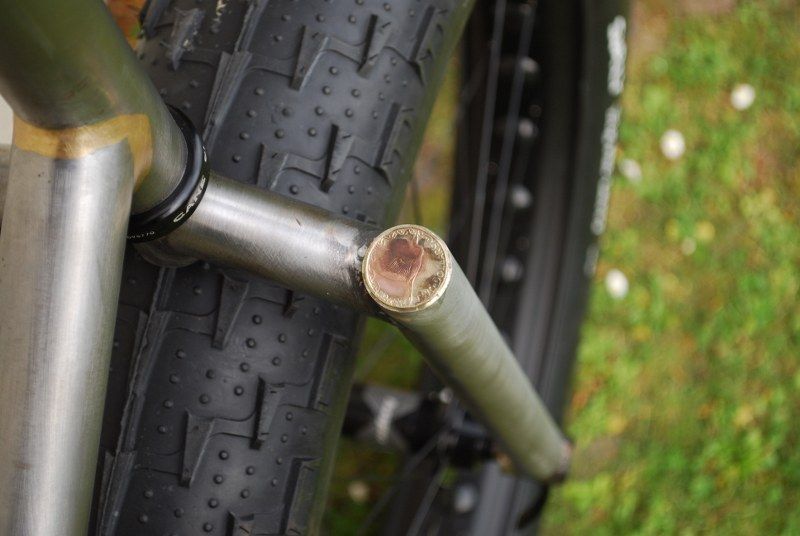
And I angled the fork tube caps and used flat sheetmetal instead of coins
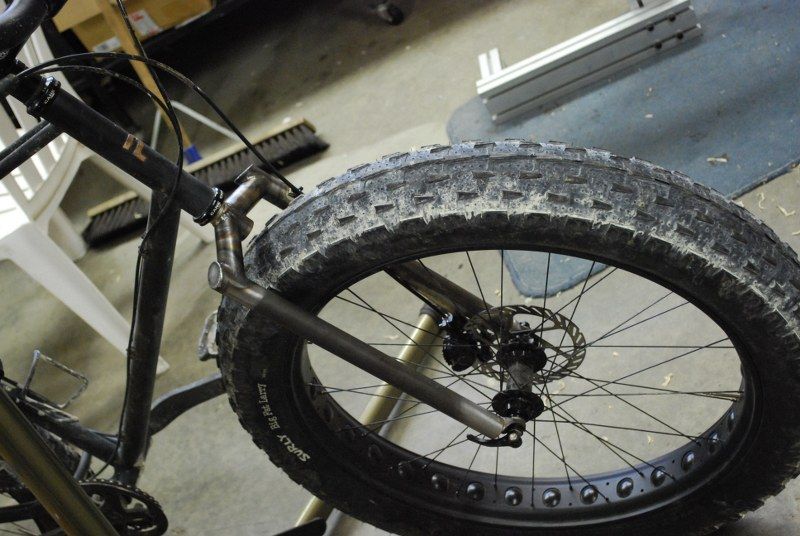
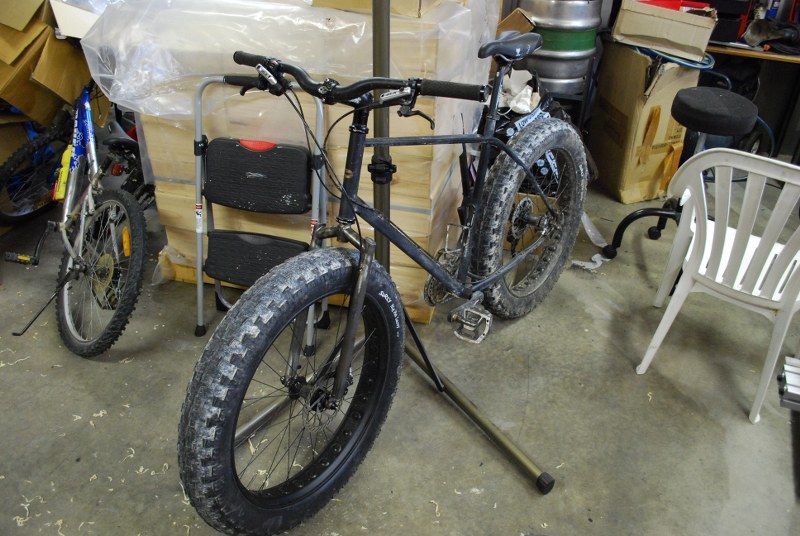
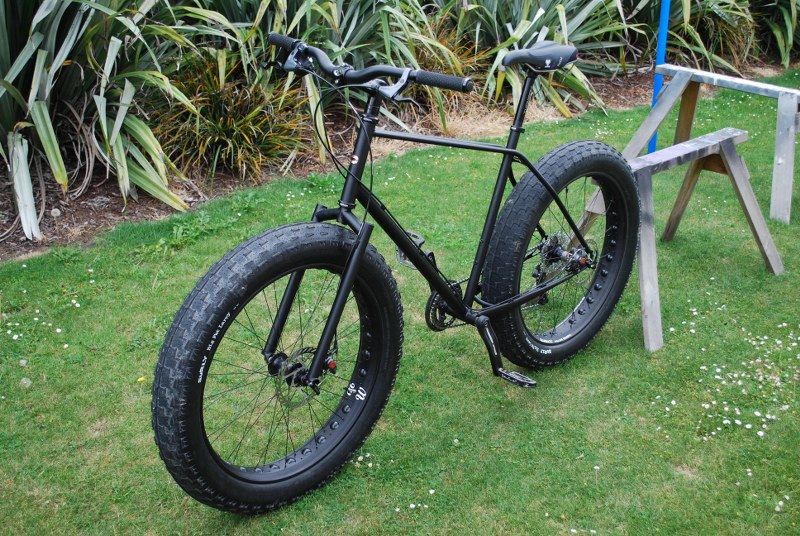
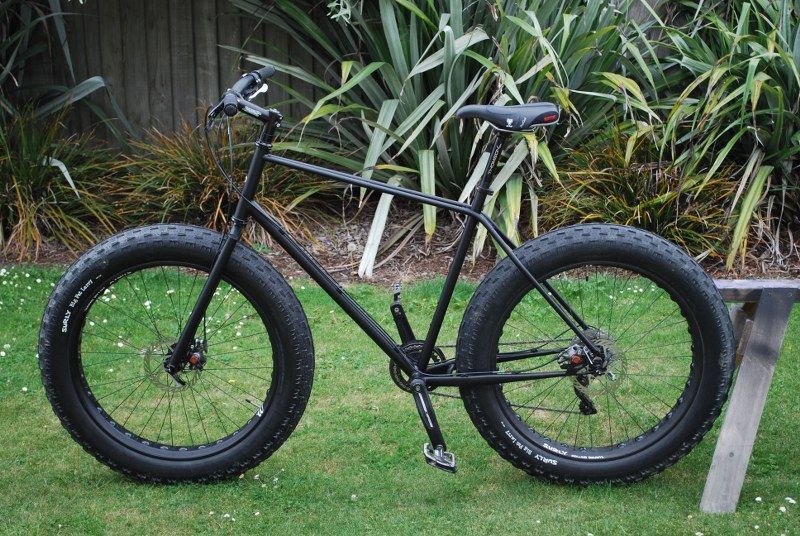
Well, it is a fork attached to a fatbike. Time to see if it will work....
Yes, I have been riding some wet trails in the recent past. All trails in Christchurch are wet and will be for the foreseeable future.
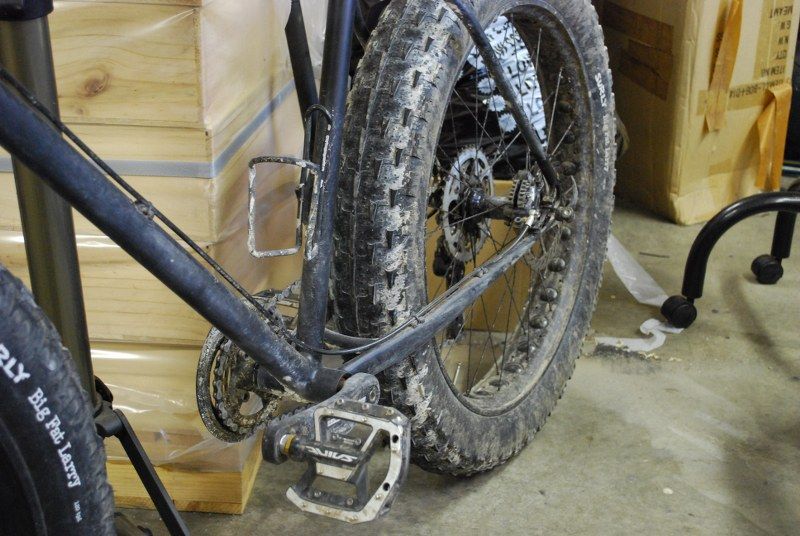
So the plan is to ride it as it is for a week or two to see if there are any niggles, then strip it down for coating. The thin coat of primer is not really cutting it in the current conditions. I have been riding it a lot though.... including a trip with some fat friends to Hanmer.

In other bike related news I built this up for my eldest daughter - I got sick of buying crappy kids bikes and I figured this would last her for a good long while. I got it as a stripped frame and forks with wheels and brake calipers. By the time I bought a headset/BB/chain/cassette/hanger/derrailleurs/discs/levers/shifters/tyres it became probably the least economic option possible. But it looks sweet and will last forever. She loves it.


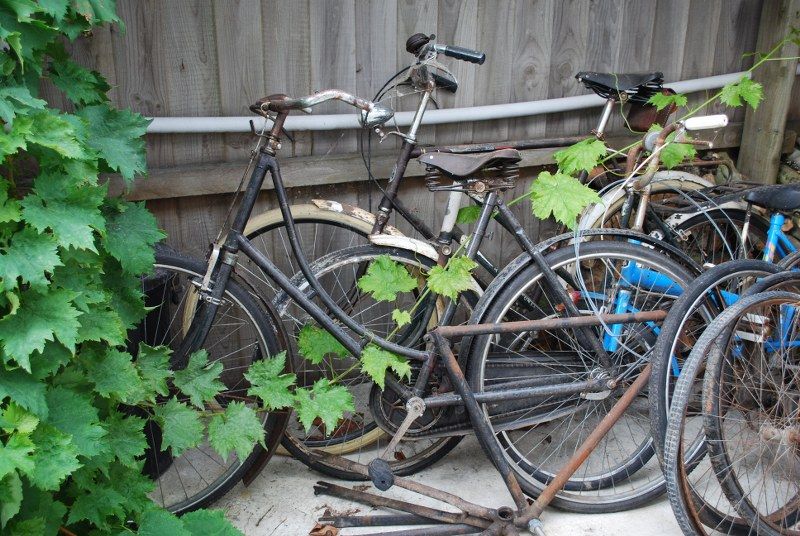
I also spotted these forlorn looking beasties in the woodshed, I will need to bring them inside for the winter I imagine.


In other, other bike related news I have a new set of tubes awaiting me in the garage. These are to make into my wife's fattie, which I may well TIG now, and looking further out I have plans for an updated commuter with disc brakes and much other secret goodness.

Saturday, 14 December 2013

Gears and Blackness

On Friday a little package arrived from Ceeway containing the cable tie brazons, so pretty sharpish the whole beast was stripped down and bits were stuck on with the hot glue gun. I was pretty excited, so I completely forgot to take any pics of this process sorry, I shall flagellate myself for my this oversight.

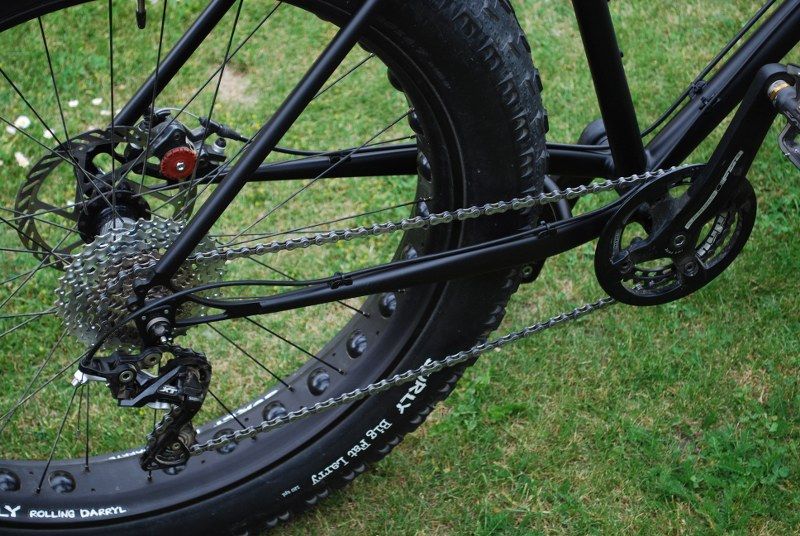
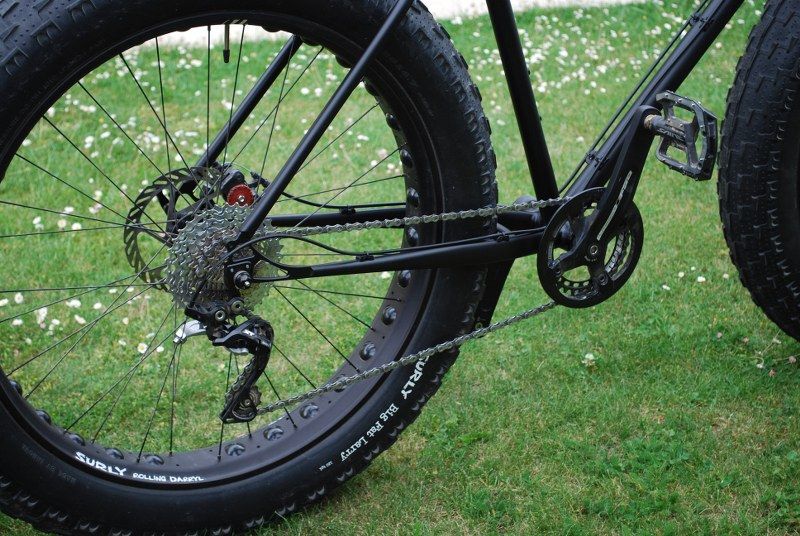
The drivetrain package arrived early last week and also got fitted up quickly, It took virtually no effort to get set up and has been working perfectly. It is still a pretty tight squeeze to the tyre when in the lowest gear, but it hasn't been rubbing or banging yet so I am happy. The gearing works pretty well in the real world. As a result of this I have been riding this relentlessly this last week, using the flimsiest of premises to go for a spin, and always with a massive grin. I commuted to work on it one day and even got three scalps, although I suspect this is something like the equivalent of a granny bike so anything is fair game. Unfortunately all this usage meant that the frame has been getting wet and as a result a fair amount of surface rust keeps appearing. I was getting bored with buffing it off all the time so I thought I would smash on some Matty B primer on it to marginally reduce the corrosion. This is the result, which I think looks pretty awesome, although it clearly shows up the extra work the fillet brazing needs. I am not sure that this will be the final colour though;

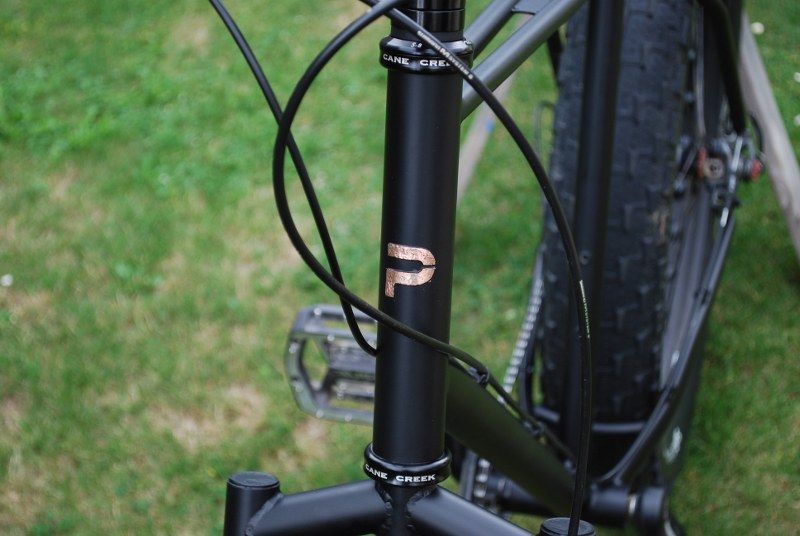
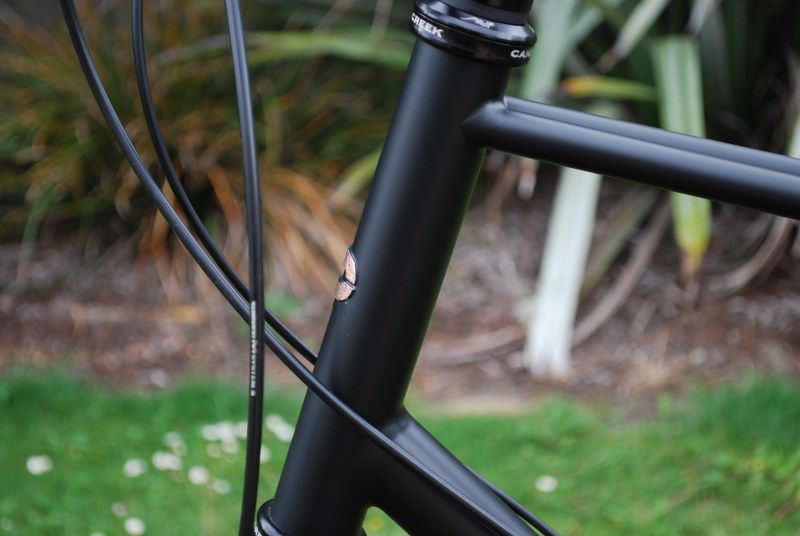
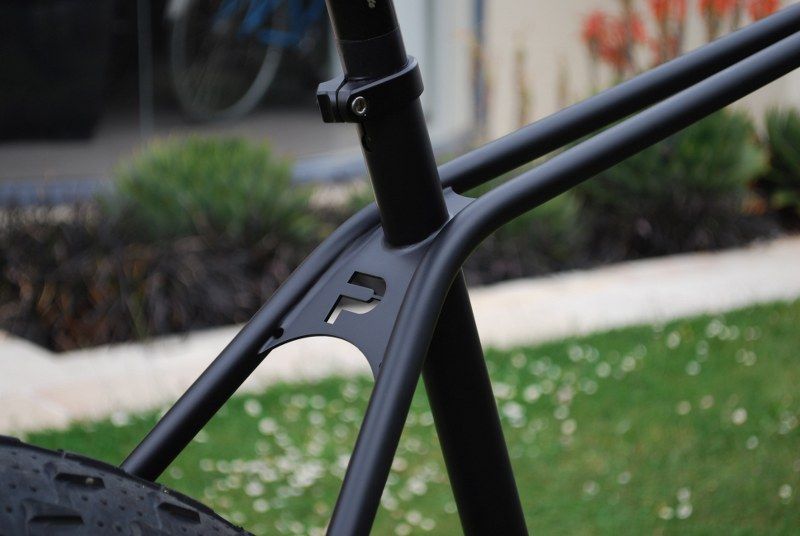
I silver soldered on a copper logo, then took to it with a hammer for a more industrial effect
The fillets are not too bad here, much worse elsewhere
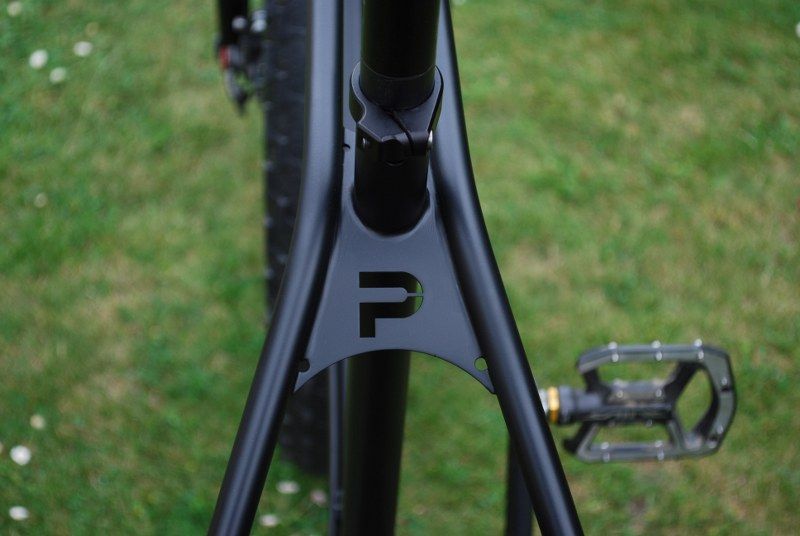
The current Pogward logo
The fresh 1x10 drivetrain - SLX cassette, XT dérailleur and shifter
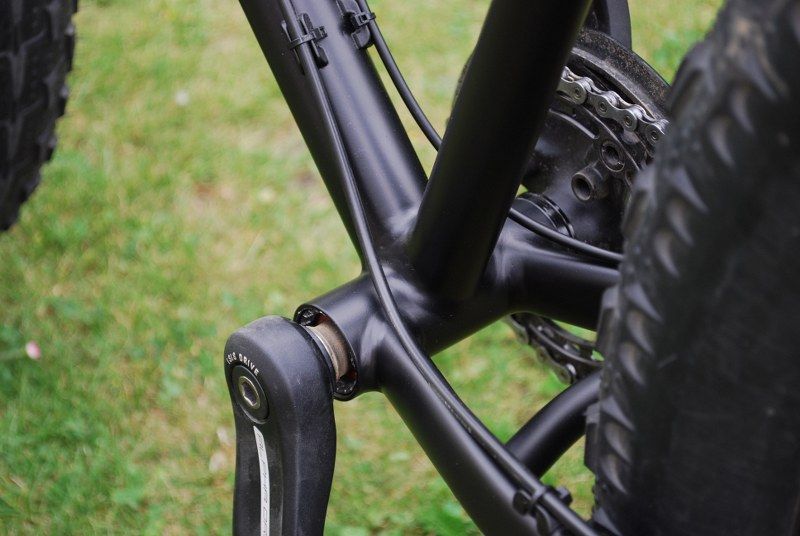
Many cable tie brazons were added. This also adds to the industrial effect
The coin definition is better now that it is all one colour
A single brazon for the front brake cable. I wrapped the cable around to the front as it was getting mashed against the back of the fork tube when it got near the downtube
The MattyB shows up flaws in the brazing pretty well. I will be able to see any cracks coming for sure
I thought this was pretty good, but it needs a fair amount of work on those fillets
I can see some hours getting used up here *sigh*
So this is pretty much it until after Chrimbo, I am tossing up whether I take this or the Disc Trucker on holiday, the trucker is more capable all round, but this is just so much fun...

Tuesday, 3 December 2013

The Fatness

I have been cranking through the work on this as fast as I can in preparation for World Fatbike Day on December the 7th. Young Dave mentioned this when I went in to pick up the bits for the 2x9 drivetrain I intended to fit to the beast. I took this on board as I figured what better way to celebrate than with the birth of a new fatbike. Not a finished fatbike mind, but hopefully a functional one.

I have hit a couple of snags though..  mostly involving my utter noobness when it comes to dérailleur setups. Initially I had thought I would just fit the standardish 3.8" tyres, but fairly early on in the build when I saw just how awesomely fat the Big Fat Larry's are, I decided I needed to have them. Unfortunately the last time I paid any real attention to trivial things like chainlines was before this decision, so when it came time to attach the driving bits it was immediately apparent that the tyre was going to hit the chain for nearly every useful gear when in the small front sprocket.

I was a bit put out by this failure of Shimano to accommodate my requirements, but after a modicum of thought and calculation of ratios I decided that a 1x10 setup could be made to work, and as long as I didn't use the bike for land speed record attempts I would be pretty much ok. I then ordered a 32T downhill front ring, a 11-36 cassette and a nice dérailleur-shifter combo. This gives me a lowest gear pretty much equivalent to the Disc Truckers second lowest gear, which should be enough for getting up hills. These bits may take a week or 3 to arrive and I wanted to be mobile for the 7th, so I bought a single speed Kit off a very pleasant TradeMe chap called Dan. I suspect I could have talked to Dan a lot longer that would be appropriate for a supposed work day I was bunking off from, plus I was scared he would show me other bike parts and I would be powerless to resist, so I made my escape. I am now waiting on a single speed tensioner to make the thing actually rideable. Fingers crossed for this week.

The seatpost was another wee snag, I assumed that the ID of the seatpost was going to be 27mm according to the specification, which meant a simple job of reaming it out to 27.2 was going to be the go. Upon inspection the seatpost tube actually measured 26.6mm and it seemed a shame to thin things out too much, especially as Canyon flips will soon be part of my repertoire no doubt. I could only find a second hand Thompson Elite Inline seatpost on Trademe that was smallish enough at 26.8, so I grabbed it figuring it would do for now, and if it is too rough I would find something else later. In the mean time Dave leant me a vintage MTB post that at least allows me to get a seat on the thing.

I also had a wee beg on Vorb and borrowed some useful bits from a chap called Gumby - I can't tell you how useful that stuff has been - I owe that man a beer. I also did the same from an old workmate called Mike, and between the two suppliers I have sorted an acceptable cockpit sizing.

So anyway, today I decided I was going to ride it no matter what, even though I had a droopy chain, so I chucked the seat from my single speed onto it, checked everything over and rode it up the road. It was hilarious fun even though the chain meant I couldn't put any real power down. It feels pretty good, with no obviously bad handling characteristics or waywardness. It is a bit hard to say though so I shall wait till I have used it in anger. The main thing I notice is the incredible thrumming noise from those tyres...

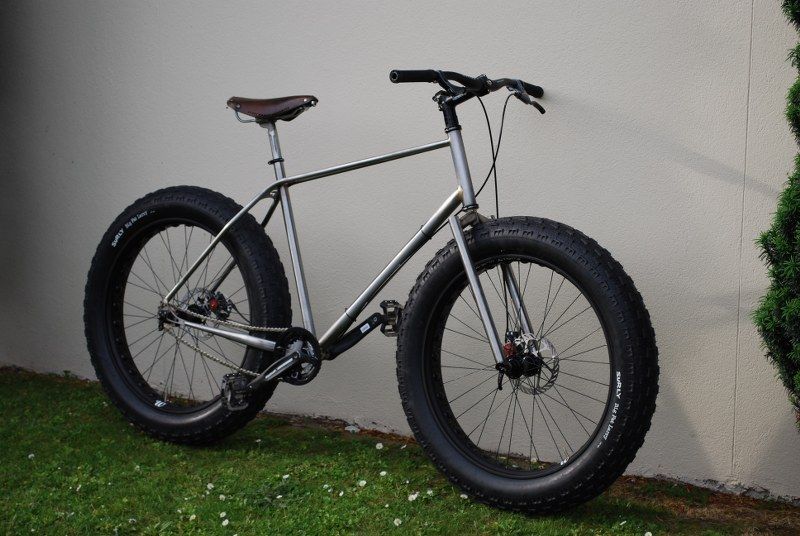
I dub thee 'The Fatness'
I am sure I could ride across the Cook Strait without pontoons on those tyres
I am gagging for that chain tensioner to arrive
The offending drivechain area
A probably illegal use of the local currency
That vintage Brooks actually looks pretty good on The Fatness
So there is still quite a lot to do, I have ordered many many brazons from Ceeway that will allow me to tidily zip tie the cables to the frame. This system is on the disc trucker, and as I am using full length cable sheathing it makes a lot of sense. Then sorting the drivetrain and after that some testing is in order, and then many hours of cleanup before I get it coated. I am not sure exactly what this will be yet, but a decision is getting closer...

Sunday, 6 October 2013

Tiny Cracks and Pogward Fatness

So last Sunday I dressed in my best dapper tweed and went along to the Christchurch City Council Open Streets event (apologies to those without twitface, these are the best set of photos I could find and link to). I decided to take the Pogward along, as my normal tweed bike is still in the depths of my garden shed, behind many other large and difficult to move items. I was going for the mid 20th century randonneur look, so I removed the rack and added the handlebar bag from the Surly onto the seat of the Pogward, a move that worked so well it has stayed there all week.

All went well and it was a rather enjoyable outing, I even met someone who had actually been reading this blog which was amusing.... however during the event I noticed a very slight hairline crack on the top brazed joint of the stem. Clearly this needed sorting, as historically my face doesn't deal very well with impacting the ground from nearly 2 meters up, and I have a pretty robust avoidance policy in these situations.
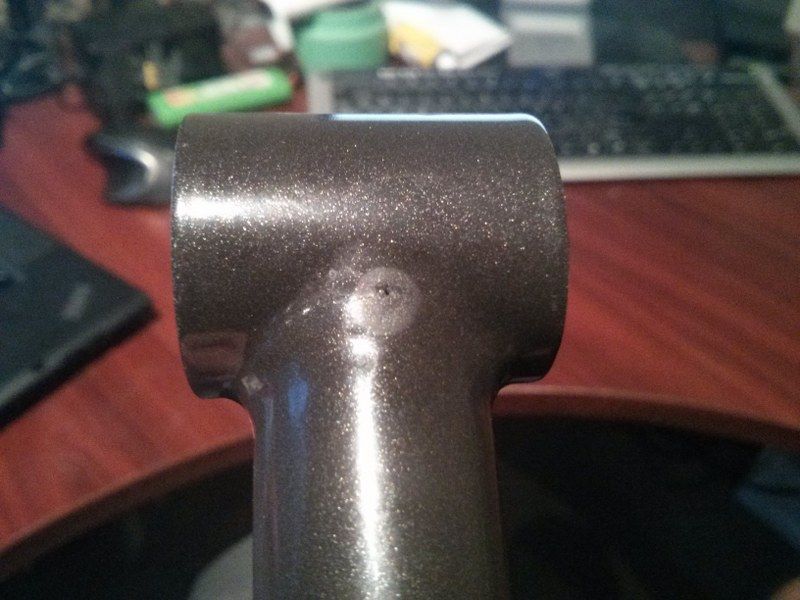
Hard to see the actual crack, but it has obviously propagated from that wee pit

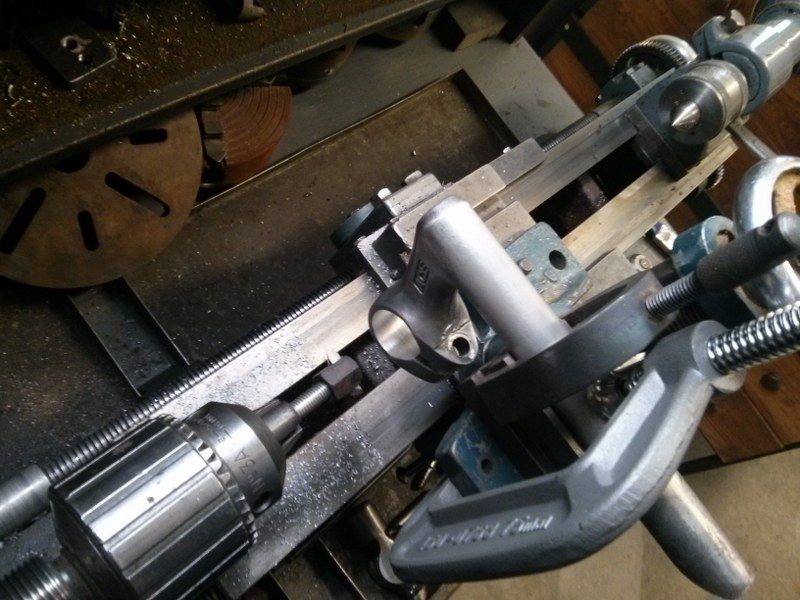
After I gingerly rode home I pulled the stem off and set about finding a temporary replacement until I could sort it further. the only thing I could find in my box of goodies was an old Ace stem with roughly the right geometry, but unfortunately it had a 25.4mm bore, and the VO bars are 26mm. I had a think about how I could sort this out using what kit I had in the garage. Serendipitously I discovered almost immediately that the Grayson has a morse taper in the spindle which means you can mount a drill chuck in there. This meant that I could just possibly pretend that it was a mill not a lathe, and bodge ensued;
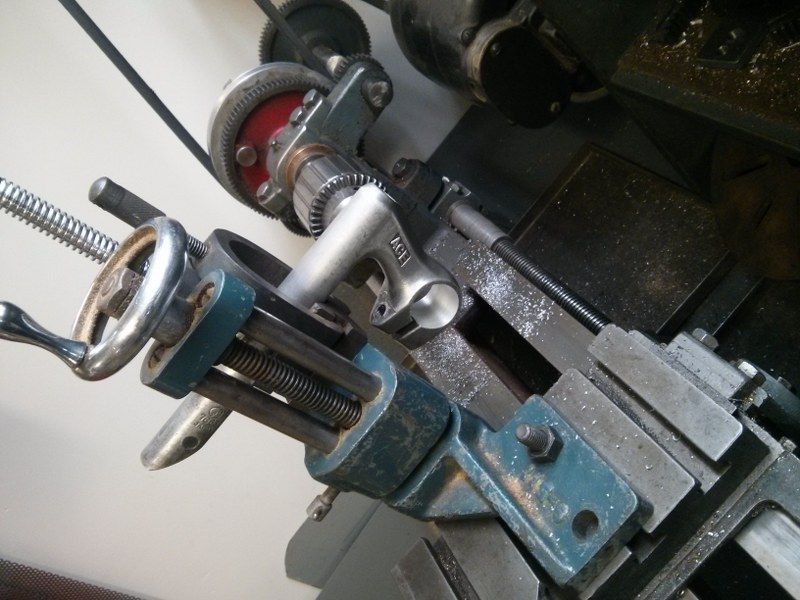
Not pretty or particularly rigid, but it did work
I made a special boring tool for the job from a bolt and a double height nut, incredibly hard to adjust but again, it worked well enough
I had some 1" solid bar that had centerdrill holes in each end, I used this to align the stem bore with the lathe centerline. Things wobbled a bit during the machining process, so I took it very gently. I really must buy myself a mill, I have needed one badly so many times over the last year.

This was all good fun and meant I could actually ride the bike to work again, but clearly this was just a distraction from the real excitement of the week;
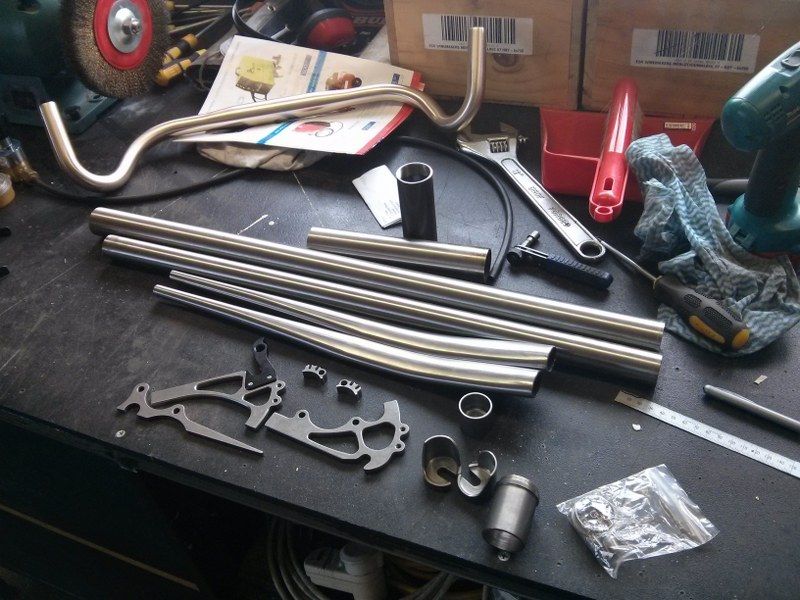
Shiny things, yesterday
What is that? I hear you asking.... and the answer is; The bits for the next Pogward Frame O' Joy™, which will just possibly look a bit like this;
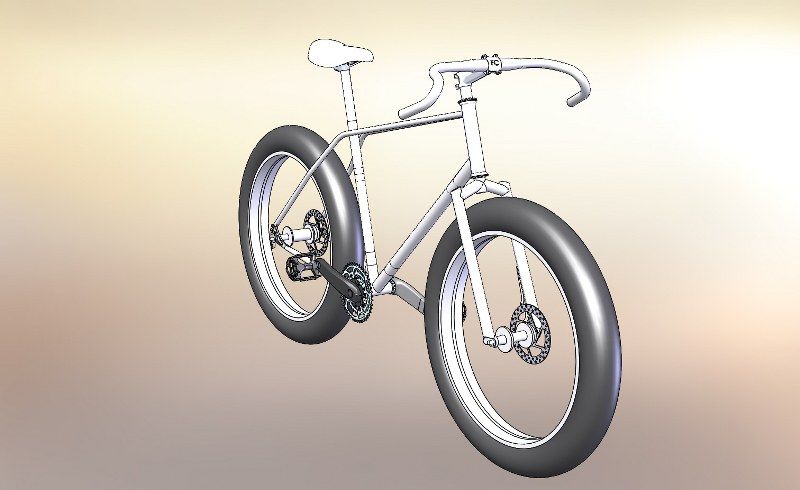
Mmmm, the fatness of it all.
Yes a Fatbike. I have fancied one of these for a while having ridden a couple previously. The bars are from Tardme, the tubes are from Ceeway and the miscellanea are from Paragon Machine Works. The bars are On-One Midge Offroad Drop Bars, which I got just cos they looked sexy and I thought might look well on a frame such as this. The tubes are oversize mountainbike Columbus Thron tubes, I got those again because I was happy with the robustness vs weight of these tubes on the commuter, stick with what works I say. The Paragon stuff is pretty sweet CNC'd kit and there is the major benefit of having CAD models on the website, which makes modelling a frame in CAD very quick.

The keen eyed amongst you may notice that there are no seat stays or top tube in the parts collection, this because the design harks back to a BMX I had when I was 12 or so which had twin top tubes all the way from the head tube back to the dropouts. This bike was fully chromed and the envy of all who spied it, at least in my mind it was... If I can capture a wee bit of that misty eyed goodness in this frame then I will have succeeded. The tube for that and the forks is currently on order from Lianne, I should see it in the next couple of weeks.

So this weekend was given over to modifying the frame jig to suit the new geometry. This is where noob assumptions have caught me out - I never imagined I would be making a frame with a 100mm wide bottom bracket, a 170mm rear dropout spacing, a 135mm front spacing, a 1-1/8th threadless steerer or even a frame with different head tube/seat tube angles. I spent considerable time drilling and filing things to get the jig to fit the geometry, then started to sort out the mounting points;
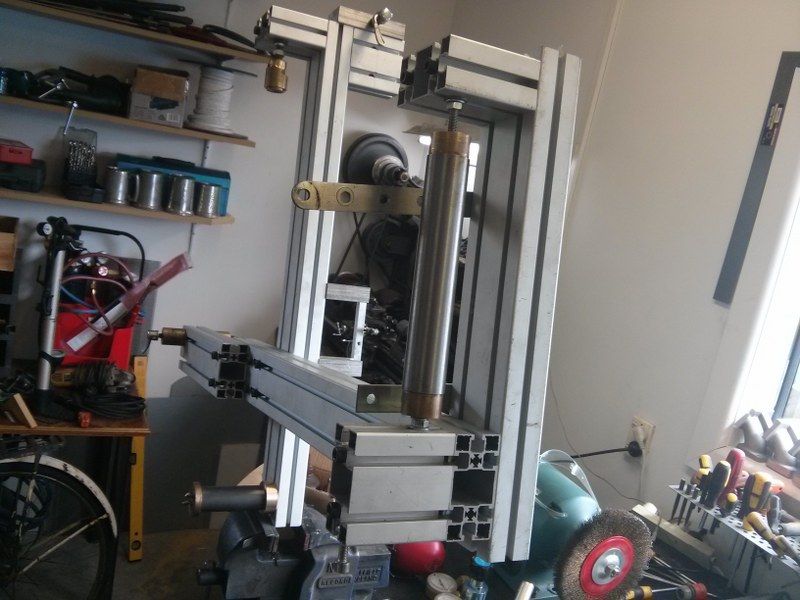
The headtube and seat stay just needed the top mounts slipping down a tad
Bottom Bracket mounting needed a new inner mount to get the correct spacing
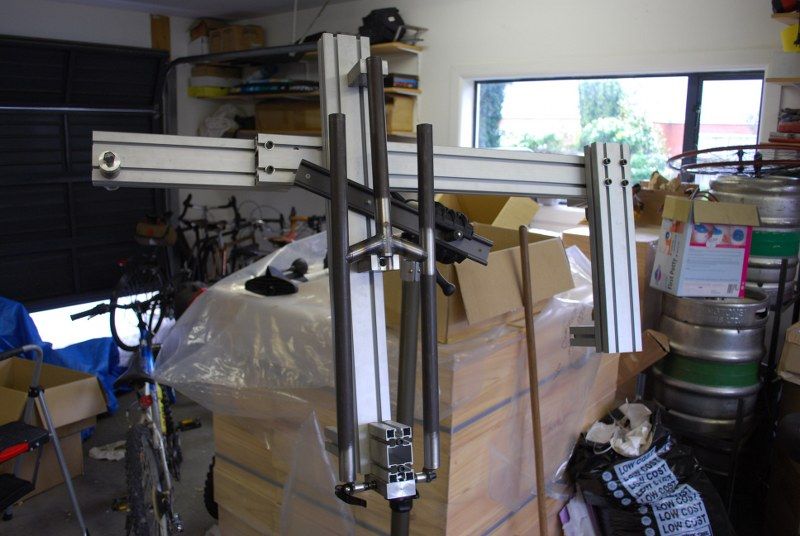
Next up will be the axle spacing, this will probably be addon bits rather than reworking the whole thing, I just need a couple more taps to do this. After that is the fork jig, a bit more of a serious effort will be needed here unfortunately. Maybe I will make a whole new jig to keep it easier to handle, I am not sure yet.

So the frame will either be Tig welded or fillet brazed, I haven't yet decided that either.... I have just bought a new welder that is a combo Mig/Tig, but the Tig function is pretty unsophisticated compared to some machines I have used in the past, so requiring a wee bit of skill to get a sweet joint. Balancing this is my slightly increased fear of fillet joints cracking, a recent experience of which has tainted things a bit. Fillet brazing is probably going to be the way though, I shall just pay a lot more attention. The forks I definitely will Tig, the many kilograms worth of Chumly they will see has already decided that....

A lot to think about then, and much more to discuss - gears, wheelsets, brakes etc....
Tuesday, 28 August 2012

The actually fitted Frogmouth MkII

Another quick and dirty update;

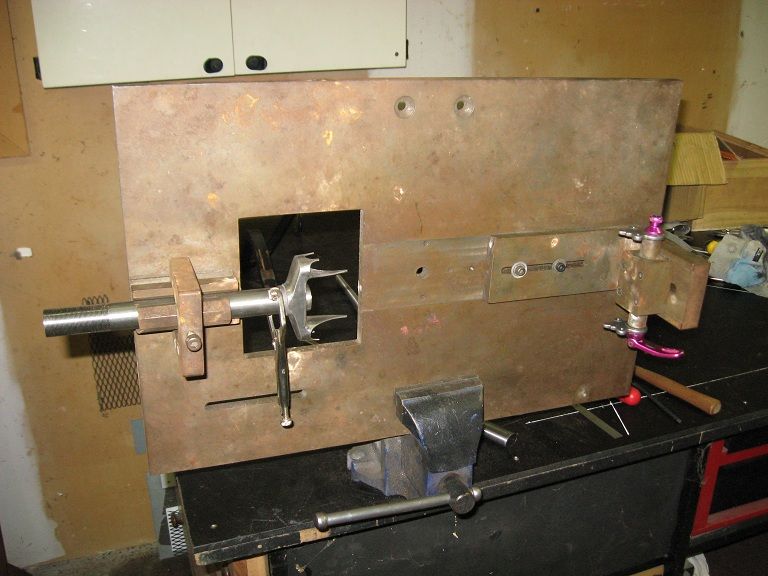
Tonight's effort was to blend in the dropouts to the tubes as you can see below, however over the weekend I also modded the jig a bit as I was not happy with how square the dropouts were being held. Doing this also meant that the dropout spacing and centering is bang on now.


Also I just remembered that all this time I have neglected to tell you all about the tubeset that this work of art is being made from. It is all Thron OS tubing, which is a reasonably light, double butted, mid range tubeset that seemed to be the best compromise between weight and robustness. I have found a few references to how well suited it is for the amateur framebuilder due to its slightly better heat resistance, so it seemed the best bet. Time will tell I guess, but assuming that my welding will stand up to the job, then I am hoping the tubes will stand up to the immensity of Pogward that will be pounding it on a daily basis...

Thursday, 17 May 2012

A visit from the fork jig fairy

The fork jig fairy came in the night and left these under my pillow;


Which would explain the crick in my neck in the morning....
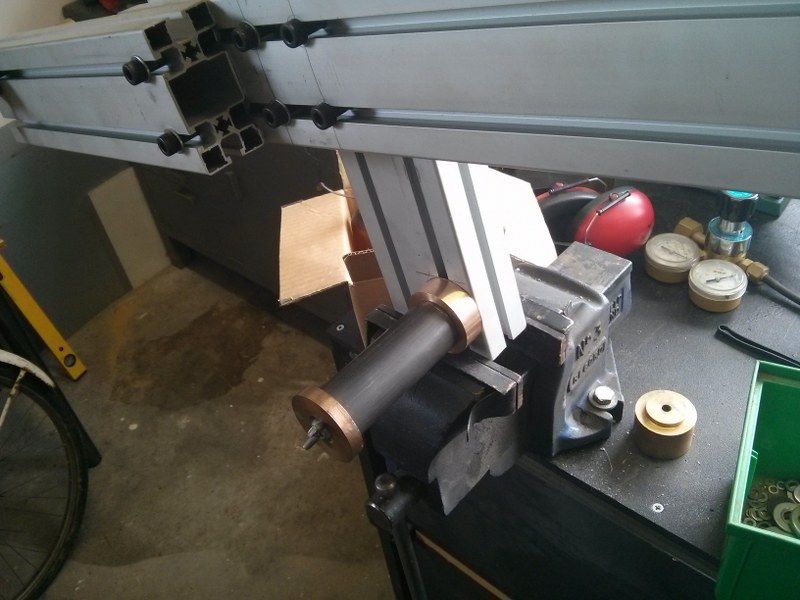
Actually these lovely bits came via my new best friend Simon, who has very kindly lent them to me to kick off the fork build. This has been hampered somewhat by the discovery that my steerer tube is 12.5mm too short to be used with my geometry - sods law really as this was the only bit I had not modelled in CAD yet. However, I had already decided to get a few more bits from Ceeway, so I ordered these along with a couple of longer steerer tubes, and parts to build another set of forks.

The second set of forks is because Dave at my favourite bike shop ever got me excited about Biplane fork crowns the last time I was there visiting.

Dave has this amusing sales technique of showing me something lush and expensive and/or old and awesome, then telling me he won't sell it to me. But by then my bicycle lust/purchasing appetite is whetted and I usually walk out having spent every cent available to me. He is a bad man.

Anyway, tonight's effort consisted of discovering that I lacked half an inch somewhere important, then compensating for it by buying stuff off t'internet. I also spent a considerable amount of time positioning the fork ends in the jig just so;


Not much visible reward for the excruciating level of time and care that I put into that...
In other news, the Minitec pricing came in, after I regained consciousness I found my wallet missing so I assume that will arrive soonish.

In other other news, I am getting my dropout design laser profiled as we speak.

Saturday, 5 May 2012

Machinery time

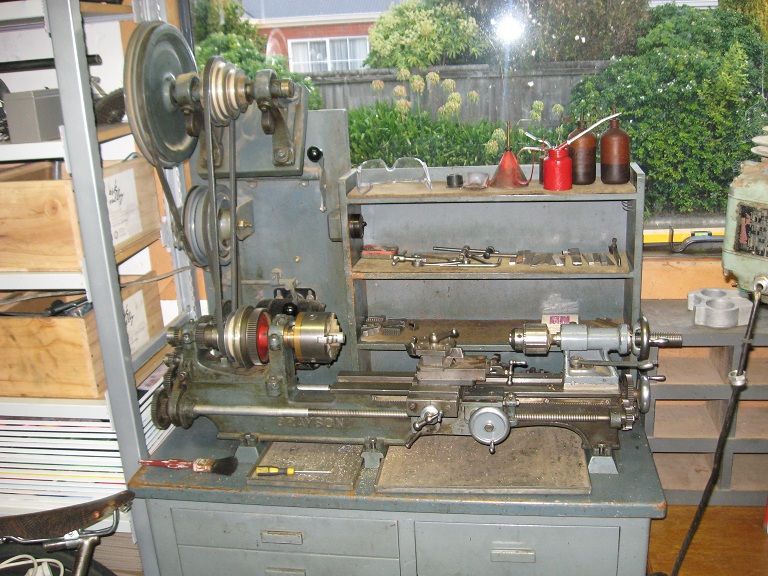
Today I have reached a major milestone in this project, and in fact a major milestone in my life, for I have purchased my very own lathe, and what a beauty she is;


I have wanted a lathe forever, but it is only due to the sale of my beloved Fiat X1/9 that I have had the space and the funds to achieve this.

According to my research the lathe is at least 70 years old and so achieves several of my other goals in life; to be old, grey and shagged. I am pretty sure it would not satisfy the needs of my new hero, but to a man of simple tastes and limited skills (me), it will do just fine. I will use this to make bits for my frame jig, and probably a few actual frame bits as well.

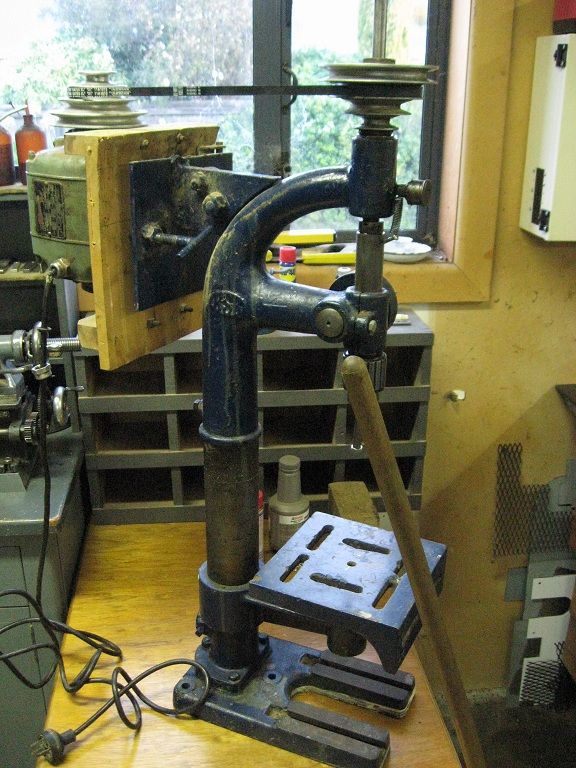
I also bought this massive beast as well;


I can probably start an antipodean branch of the British Science Museum soon at this rate. Actually I have been to the Science Museum a couple of times, and there has been a quite irritating tendency towards whizz bang interactive computer displays, obviously in an effort to allow modern children to utilise their 20 second attention span and still learn something. I cannot abide this nonsense, give me a vintage wool baling machine in a dusty glass case any day, I can drool over that crap for hours. Clearly I am in my element here.

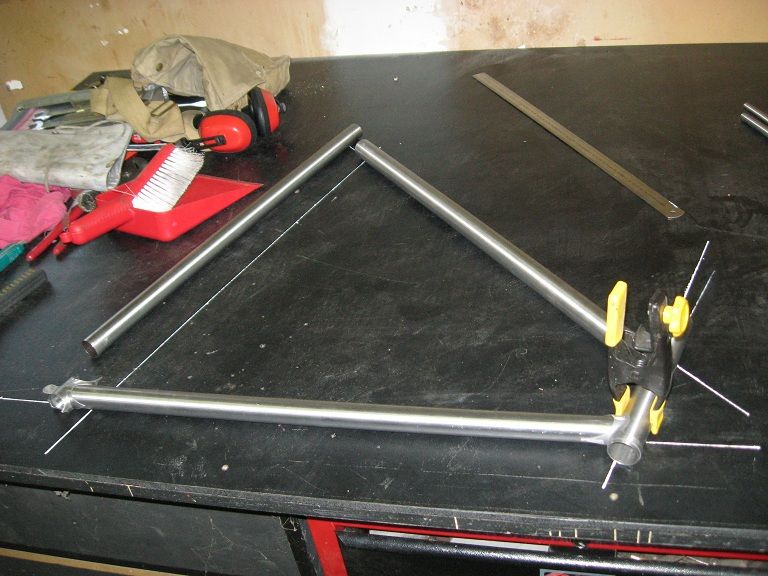
So on the actual frame building front I have laid out the frame geometry on my workbench so I can check the angles, and started mitering the tubes. I have discovered that this is so far a relatively simple task as long as you take your time, although I have yet to miter both ends of one tube so there is plenty of scope and time for me to bollox it up.

Laid out to check I have all the bits right;


This one was simply a fantasy exercise, so I can make the bicycle equivalent of vroom vroom noises, a quiet hour passed gazing at this, the wide vistas of my imagination taking me effortlessly over high mountain passes... it was only the growing patch of drool on my chest that snapped me out of it;
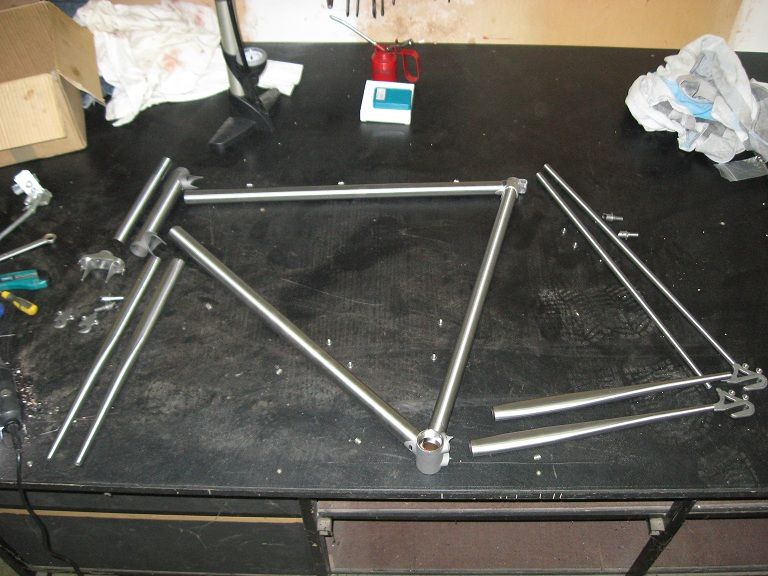

And finally at the bottom left is my very first mitered joint, exciting stuff I know.
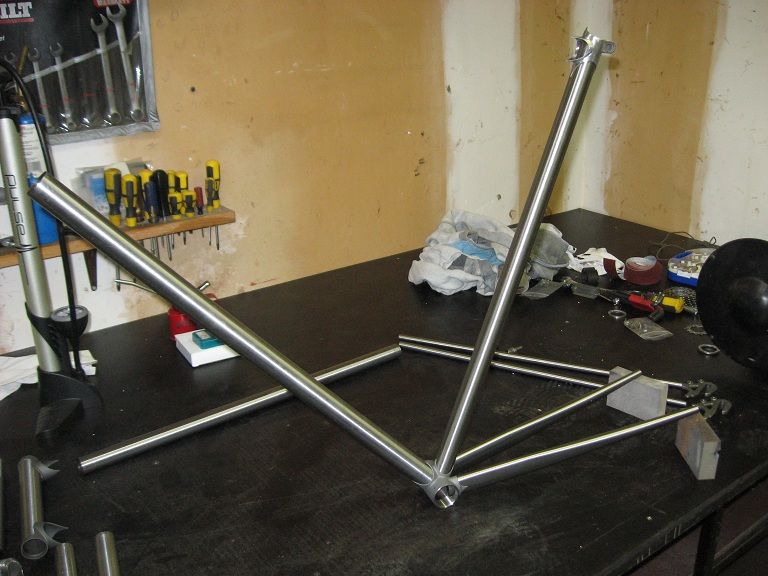


So this week the focus will be on getting jiggy with it, I am gagging let me tell you.

Sunday, 29 April 2012

In the beginning..

Well, sort of the beginning anyway.

The real beginning was immediately after the February 2011 earthquake in Christchurch, with most of the denizens of the eastern suburbs deciding that living in houses with carpet rather than silt on the floors had much to recommend it. As the houses most likely to be equipped with such newfangled luxuries - carpets, power, water and sewerage services - were located in the western suburbs of Christchurch, there was a mass migration.

The result of which was that the traffic during my daily commute became so ridiculous and time consuming that I started cycling to work simply to preserve my sanity. Clearly no one else had taken note of the fact that during catastrophic natural disasters, a car is not really the ideal mode of transport... and really is it ever?

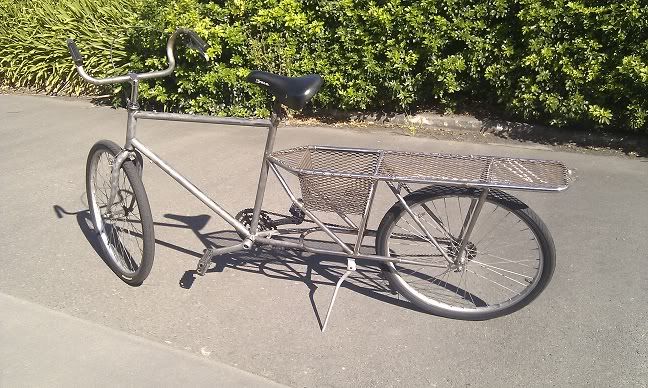
I ensured fidelity to the new cycling regime by building a truly awe-inspiring machine, a precision handcrafted longbike, which meant I could eliminate my standard non cycling excuse of having to take this or that to work, so golly I had better take the car today....


Now when I say precision handcrafted, I actually mean 'mig welded together from pretty much anything I had lying around in my garage'. It took me exactly 8 hours over one weekend to assemble, and the closest that I got to precision was sighting along the frame from the other side of the garage, and with the joyous cry of every true engineer; 'Close enough is good enough!', I was away to work on Monday on my fine new steed. This provoked much interest in the population, as I am reasonably tall and what is kindly termed 'generously proportioned', so the resulting combination of something so large and ridiculous riding something so large and ridiculous was a bit of a show stopper for many people. This amused me.

Longbike actually lasted me a good six months of daily commuting before I decided something more refined for my commute was in order, and that decision was fatal. This change of mount was prompted by my discovery of The Game, which meant something with a bit more speed while maintaining stealth was required. This foolish decision led to ever increasing numbers of bicycles littering the garage, and near daily pointed remarks from 'er indoors...

I am now quite obsessed with finding and modifying bikes, using the excuse that I clearly needed a bike tailored for [insert uncommon but quite specific circumstance] to justify every build.

Now fast forward to the present day and the decision to plunge even further into the mire of leg powered stupidity by building my own bike frame. Being in the 95th decile can make finding the right frame quite difficult, so logically the only thing to do was to build my own...what could be more obvious?

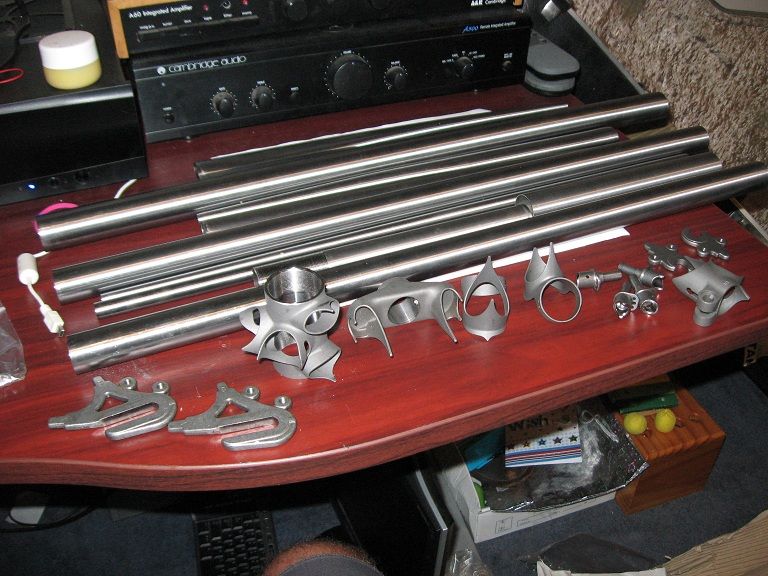
To this end, I spent every night for 3 weeks scouring the web, sketching geometries, mumbling incoherently about bottom bracket drops and head tube angles and neglecting what little personal hygiene I usually keep (my wife was overseas at the time so I could fly under the radar - Wife = 'And what have you been doing with your time my dear?', me = 'O nothing really...tidying the house and such'). A few short days after the family flew back from the UK, this wee package of goodness also turned up from Ceeway in the UK;


So now all I need to do is glue all that stuff together somehow..