Sunday 27 May 2012

Framejig Ahoy, and bonus Gazelle of Doom...

Mmmmm, Minitec


Now to make it look like that thing up there on the laptop...


Sweet. This is already one brazillion times better than the steel jig effort, stiff as a schoolboy with his first stick mag.

Now to  justify the massive expense of that lathe, this will account for one one half of a percent I would guess;


And that is pretty much where it sits right now, having well and truly used up any spousal goodwill I may have scraped together this week... this is mostly because the Gazelle finally arrived and I spend an extraordinary amount of time getting it to the rideable stage, but still nowhere near finished;


The pics do not do justice to the sheer size or ridiculous rake this thing has.

Everything was against me on this thing, every bolt was rusted up or broken off, and the sweet drum brake wheels are going to need re rimming which is why it has a spare set of 28"s on it for now. The rims actually turned out to be 700c, not the end of the world as I had a set of 700x45 tyres lying around. I thought I would chuck them on despite the poor condition of the rims, just to get it up and running, however one went bang before I even got it onto the bike...

The 700c rims are because it was actually built in 1977, so is a really quite irritating mix of old school design and newish school parts, ie the cotter crank axle was a Thompson type with pressed in shells. Of course I managed to smash one of the cones trying to remove one of the crankarms, rendering the entire crank useless. I then had to machine down a threaded bottom bracket shell and press the whole thing in. It worked well, but what a rigmarole.

On the positive side, the drum brakes were in good condition once cleaned up, and the Sturmey Archer 3 Speed was in perfect condition. A stripdown, clean and reassembly was all that was required there.

To ride it is very spacious and comfortable, and with a set of guards and various other accoutrements it will serve me well as my future Tweed Steed.

Saturday 19 May 2012

Fork 'n tweed

Slow but steady progress on the forks, I bent them up in the bend jig on Friday night, fitted up the fork ends on Saturday and cut them to length for the fork crown today.


The bending was interesting, I couldn't get the first tube to bend over the last 5 degrees of the jig even though I was putting the full and not insubstantial Chumly into it, so I tried again with a bit of heat. This wasn't enough either so I ended up giving it a love tap from a rubber mallet which did the trick no problems. The second one then followed pretty quickly, followed even quicker by an attack of the cold sweats when I realised the bends didn't quite match up between the two tubes... however my past life as a fitter welder came to my aid and a few more judicious taps with the rubber mallet had things lining up perfectly - whew. I then drew an outline around my newly created fork bends and scanned it into the computer, which allowed me to import the scan into the CAD program and model up what I actually had. A few masterful keystrokes left me with a lovely representation of the fork bends and the forks I could now create;


If only my steerer tube was long enough, that would nearly be ready for brazing....

So apart from my varied familial duties that kept my garage time to a minimum this weekend, I also partook of a bit of tweeding today on my 1930ish Hercules pathracer;


My delicate back was giving me gyp so on the way back I flipped the bars to help with the ridiculously uncomfortable seating position, the comfort transformation was remarkable. This is good news for me as I am swapping the Herc for an old Gazelle very soon, I should be able to ride far further with that. As it was we covered a solid 20 odd kilometers, yelling out our war cry of  'Smash the Lycra!' as we raced the roadie boys (with some success I might add) along Cashmere road.. I cannot tell you how much fun this is.


If you want to come along, join the group here, it is the best thing ever.

Thursday 17 May 2012

A visit from the fork jig fairy

The fork jig fairy came in the night and left these under my pillow;


Which would explain the crick in my neck in the morning....

Actually these lovely bits came via my new best friend Simon, who has very kindly lent them to me to kick off the fork build. This has been hampered somewhat by the discovery that my steerer tube is 12.5mm too short to be used with my geometry - sods law really as this was the only bit I had not modelled in CAD yet. However, I had already decided to get a few more bits from Ceeway, so I ordered these along with a couple of longer steerer tubes, and parts to build another set of forks.

The second set of forks is because Dave at my favourite bike shop ever got me excited about Biplane fork crowns the last time I was there visiting.

Dave has this amusing sales technique of showing me something lush and expensive and/or old and awesome, then telling me he won't sell it to me. But by then my bicycle lust/purchasing appetite is whetted and I usually walk out having spent every cent available to me. He is a bad man.

Anyway, tonight's effort consisted of discovering that I lacked half an inch somewhere important, then compensating for it by buying stuff off t'internet. I also spent a considerable amount of time positioning the fork ends in the jig just so;


Not much visible reward for the excruciating level of time and care that I put into that...

In other news, the Minitec pricing came in, after I regained consciousness I found my wallet missing so I assume that will arrive soonish.

In other other news, I am getting my dropout design laser profiled as we speak.

Sunday 13 May 2012

Jiggy wit it

The jig is proving somewhat problematic...

Not being the sort of man to spunk actual cash on the real thing when I can get a reasonably functional facsimile by doing it myself, I am going to build my own jig to hold framey things in place. My first idea was to make something up out of bits of not too heavy structural steel - I already own a MIG welder and so throwing something together should be a doddle. To this end I purchased a length of second hand 80x40mm channel (probably the start of my failure right there as it looked as though it had been salvaged from a beach somewhere, and prior to that had been coated with some form of rust preventative substance that could only have been sourced from a 1980's Italian car factory). Adding to my woes was that the channel web was not very flat at all, in fact 'ribbed for pleasure' was the phrase that came to mind. Certainly good for preventing conception anyway, I should have got wood.

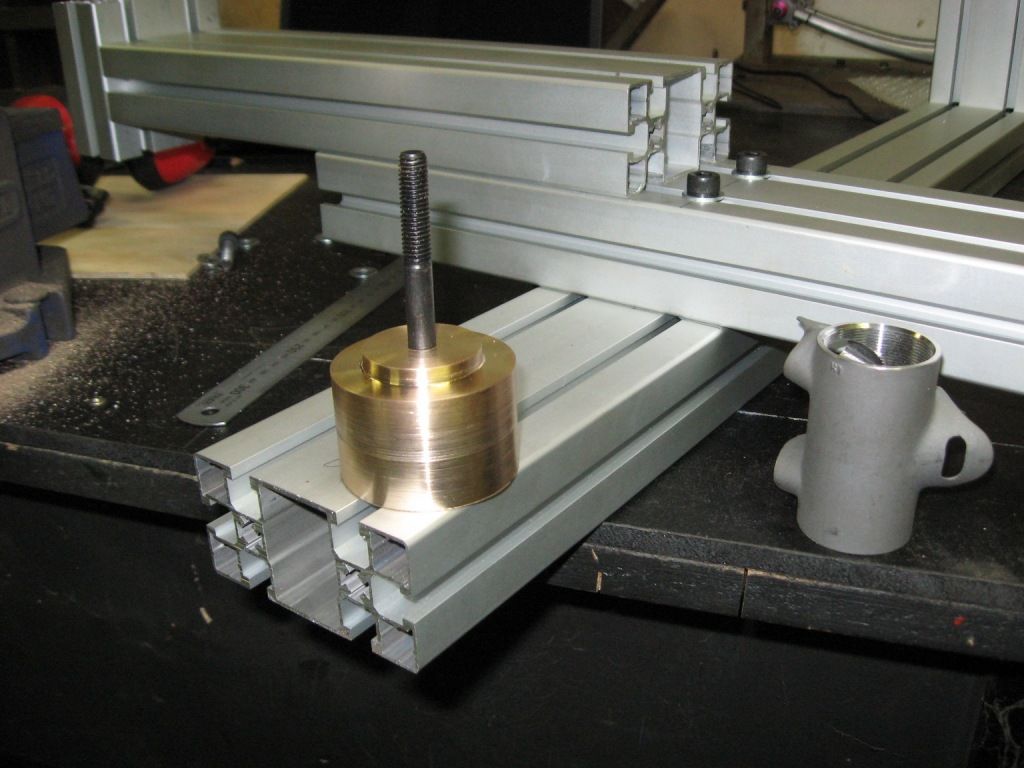
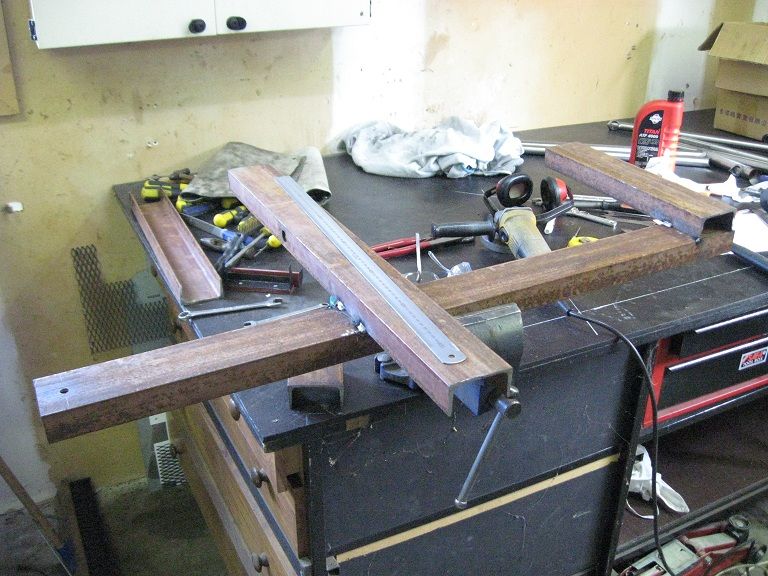
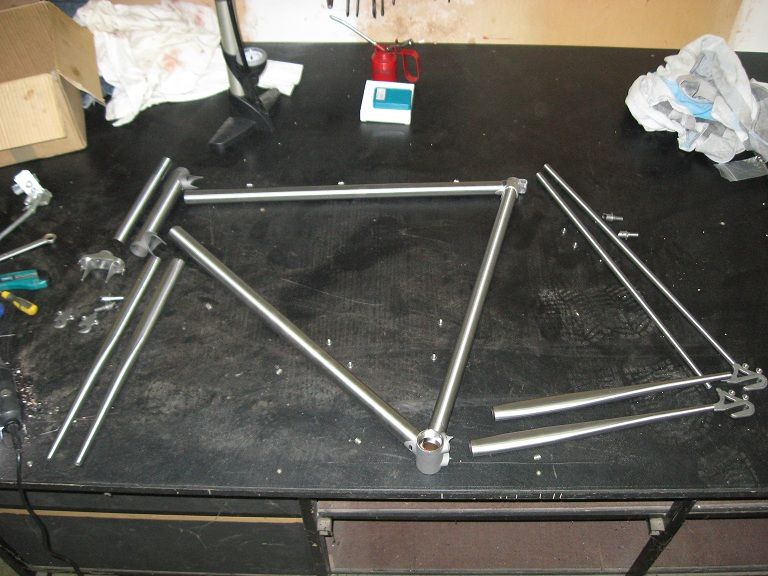
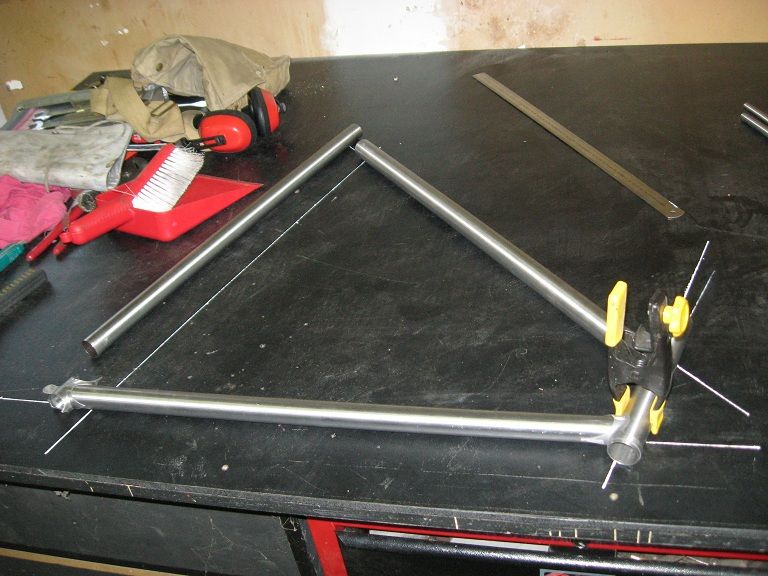
An hour or so on Saturday morning was spent creating this;


As soon as I started marking out the centerlines of the frame and such, it became immediately apparent that this just wasn't going to be good enough, a finger push was enough to twist the frame a few mm out of whack. I could brace everything with more steel but it is already a heavy little bugger. This, coupled with the actual impossibility of getting the bits even roughly flat to each other in the first place due the built in Mariana trench on the steel meant I needed to come up with something better.

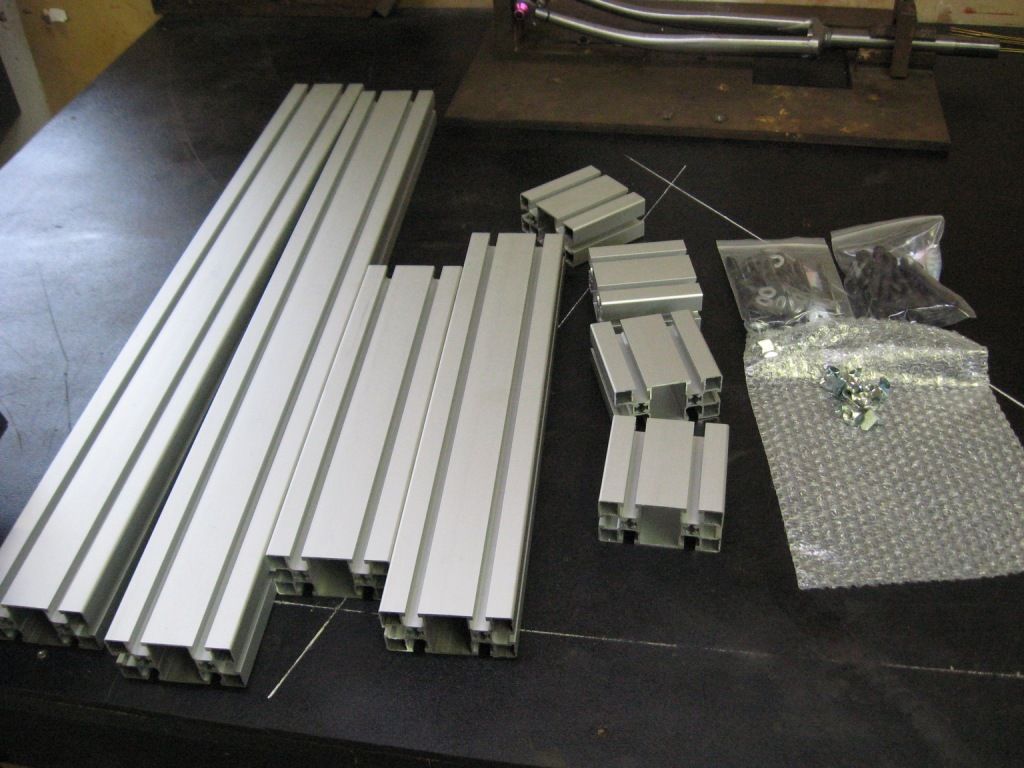
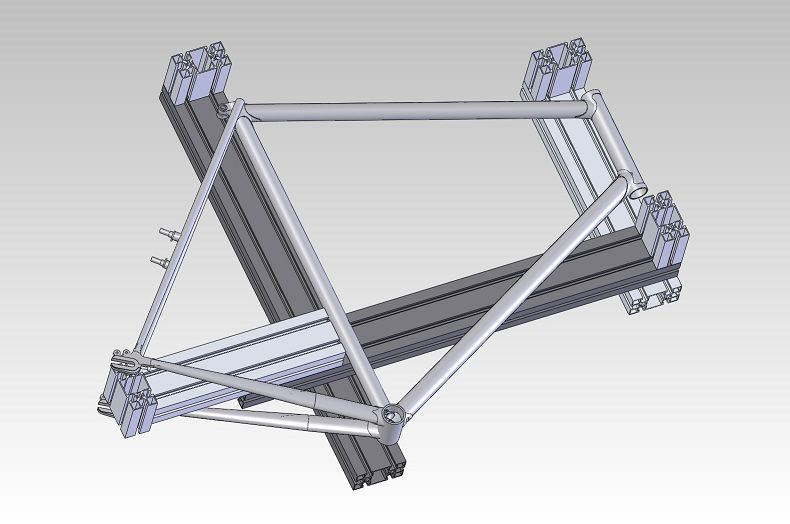
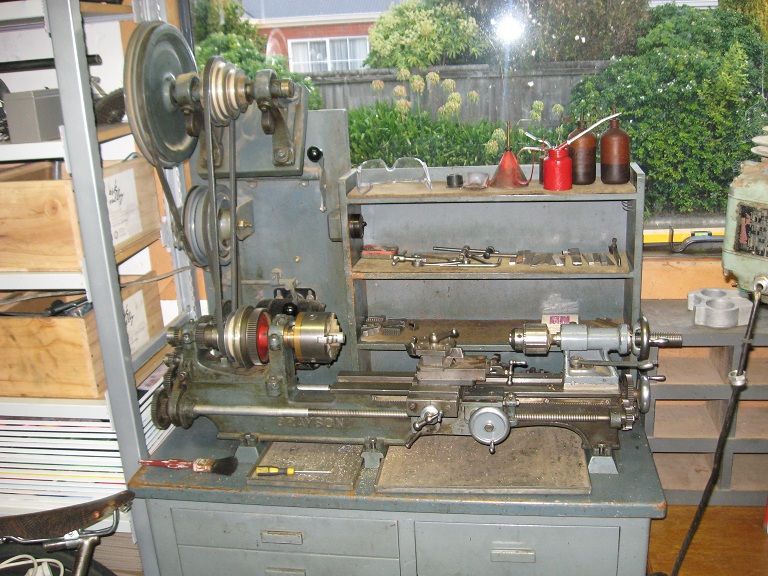
Now, I have recently designed a test rig for one of the local tech companies and the basic frame of the rig was made out of stuff called Minitec. Using this can get kind of expensive but it is an extremely flexible way of building framework for things - proper jigs commonly use very similar stuff, although it is usually their own custom profile.

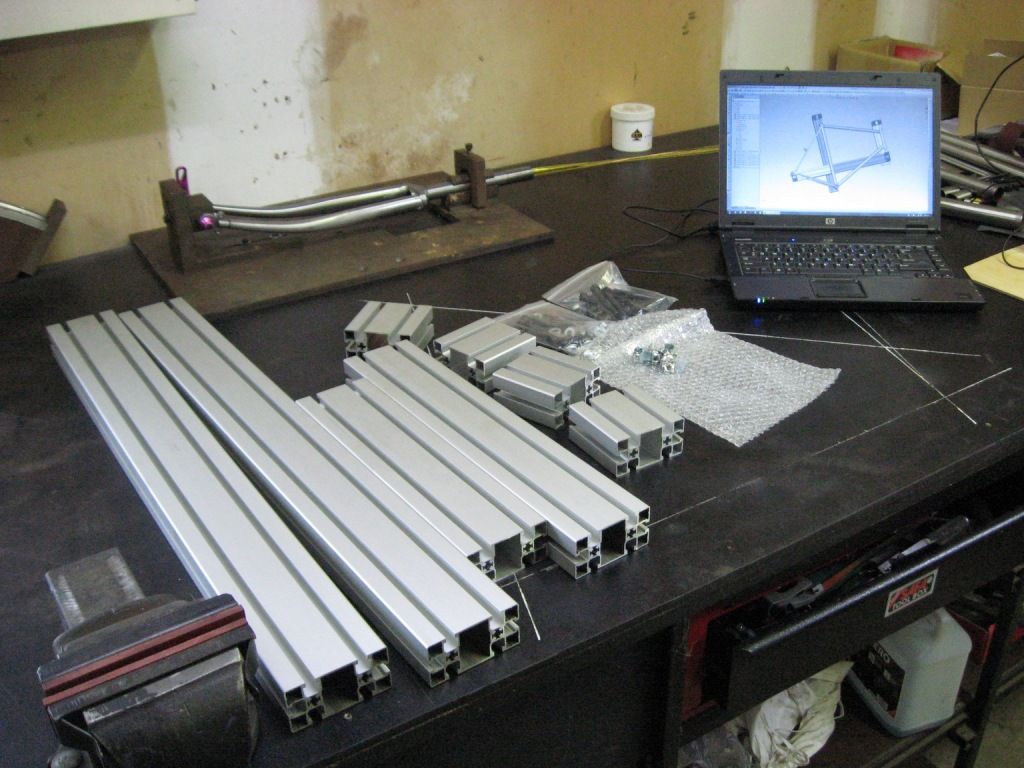
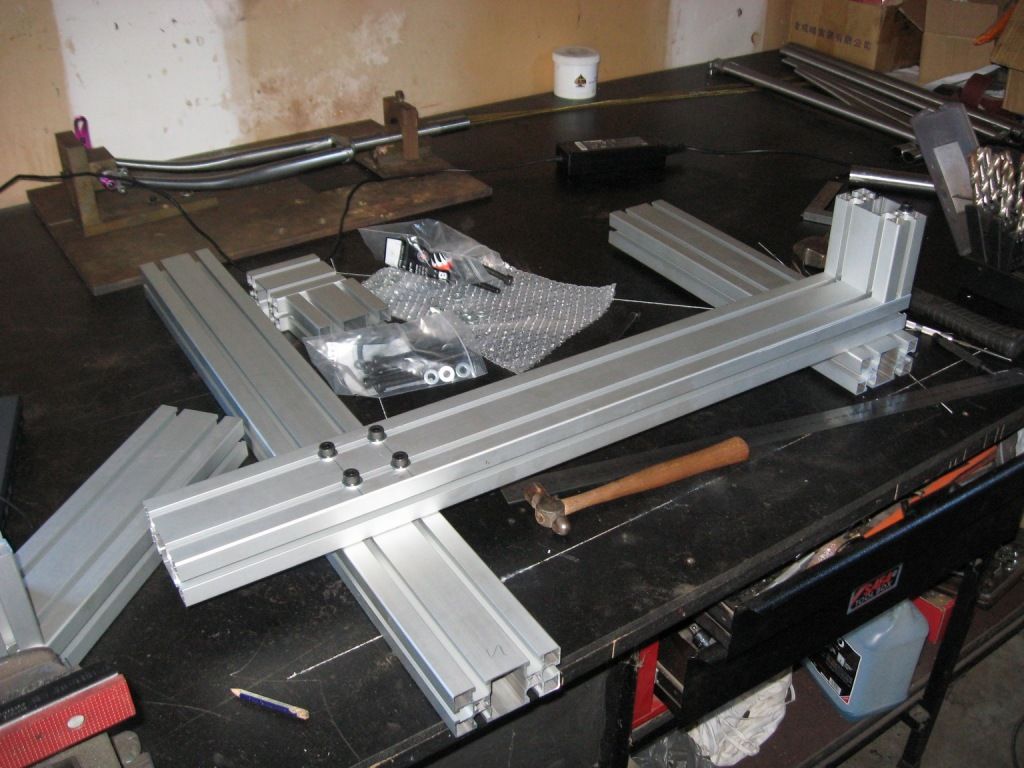
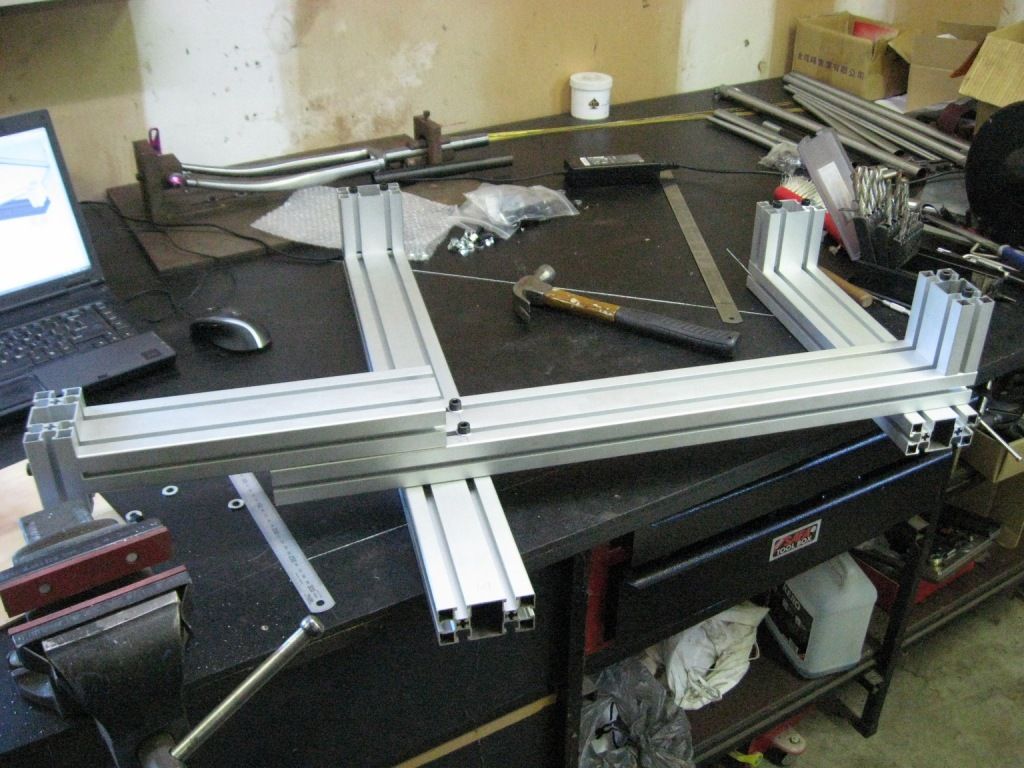
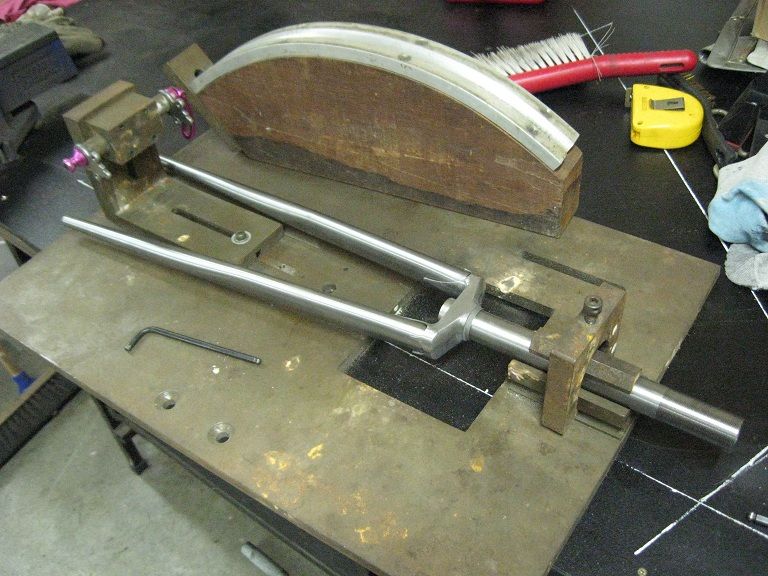
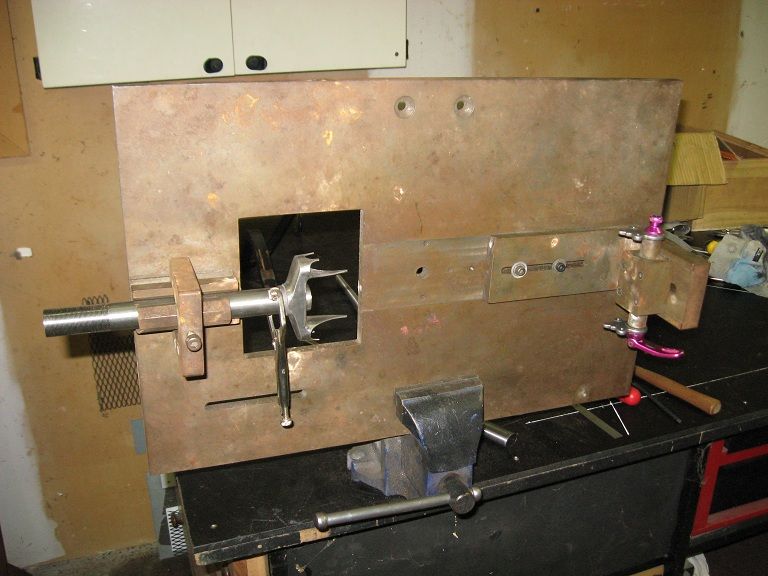
Sod the cost I said to myself, it is clearly the way forward... and in a trice I had come up with this;


Actually I came up with something very similar to that pic, but then I found this, which caused some tweaking to take place. Sincerest form of flattery and all that...

Anyways, tomorrow I will get a quote from the local supplier for the bits that I need, and assuming I need not sell a kidney to pay for it I think this will be the way forward. It certainly simplifies manufacture of the other bits that actually hold the frame, so we shall see.

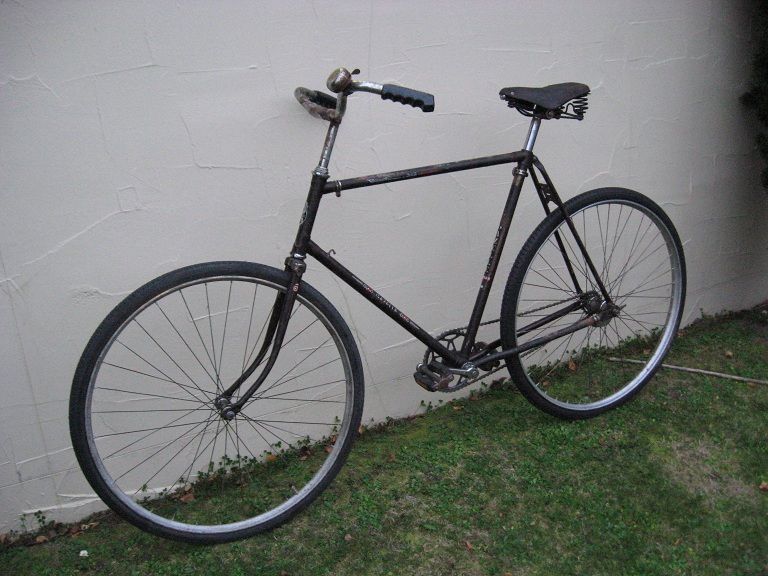
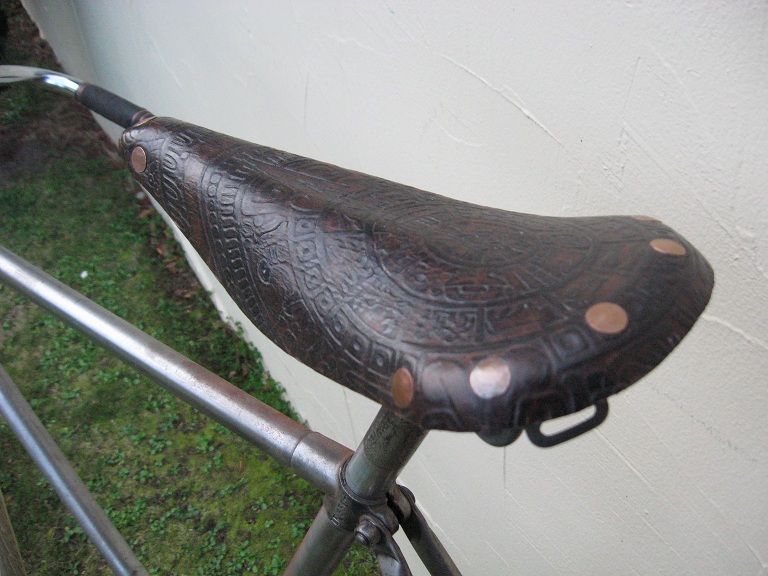
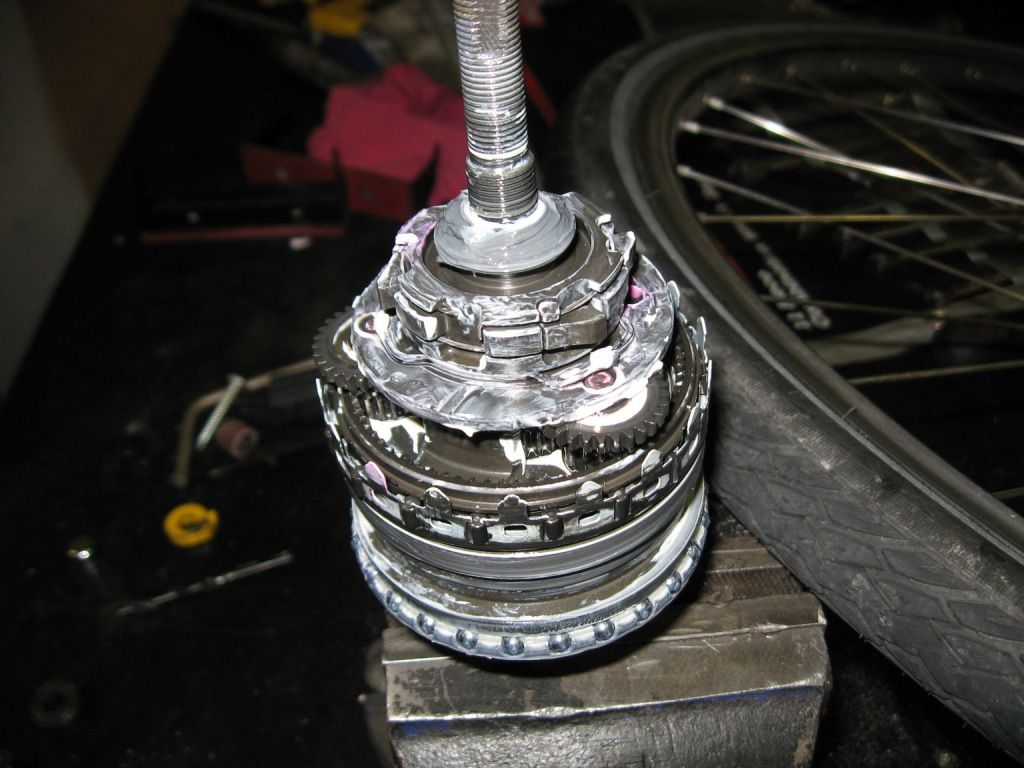
In other news, these last few weeks I have been pondering using a Gates belt drive with the Alfine when it gets put into the frame. This makes a lot of sense, particularly after a blowout I had a week or so ago, the fixing of which left my hands looking like I had lost a contact lens while inspecting the inside of an oil tanker. This episode eventually resulted in some quite fetching Ramboesque face camo so not all bad really.

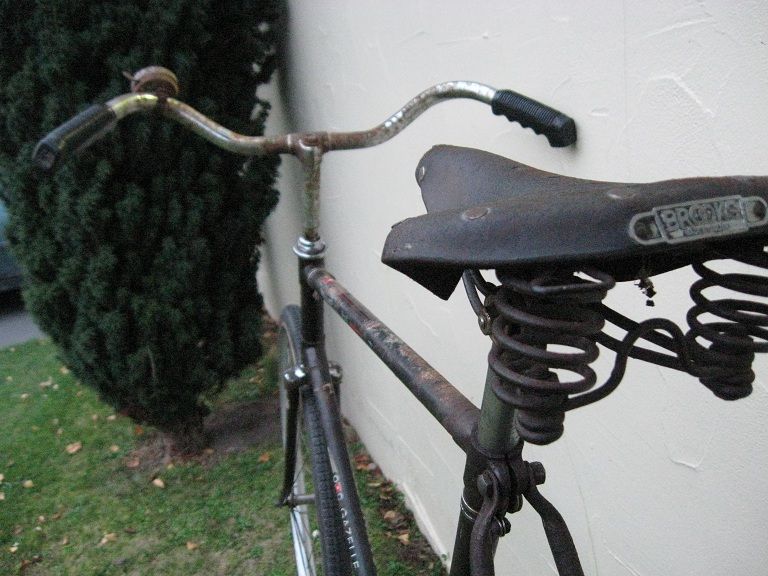
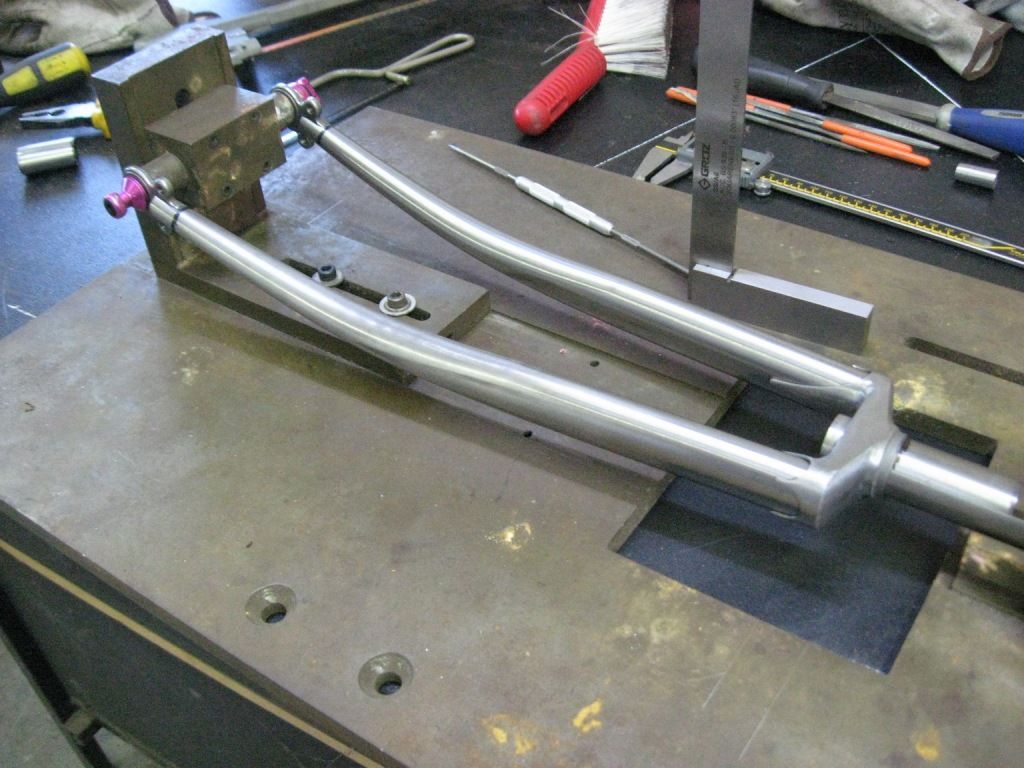
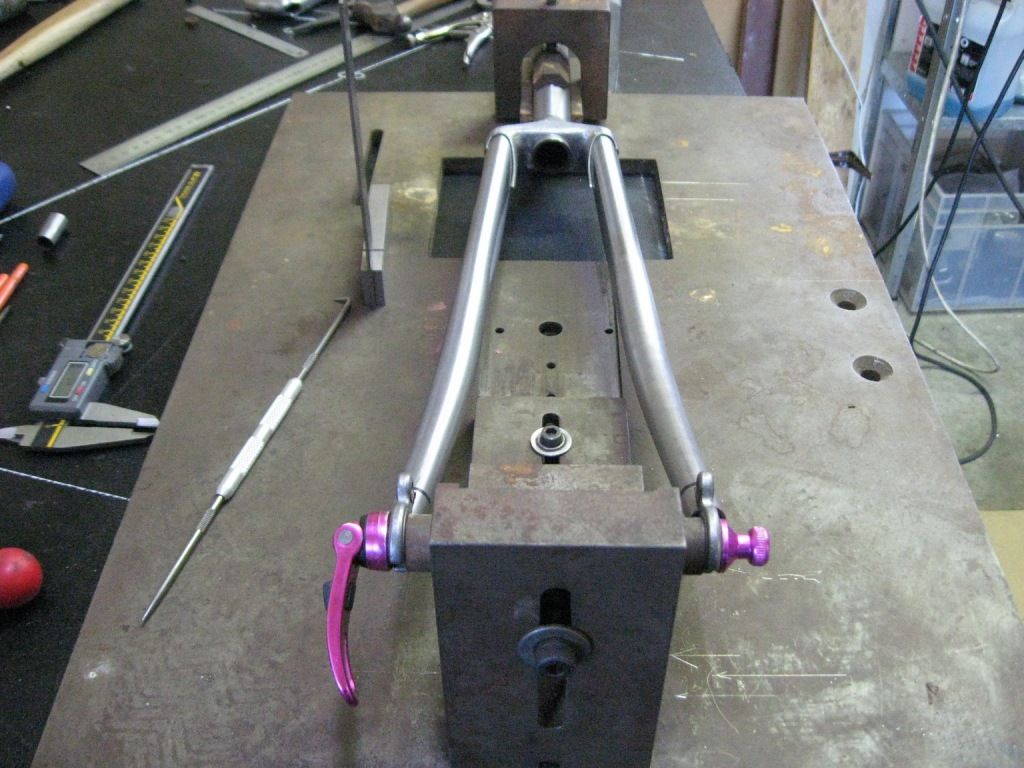
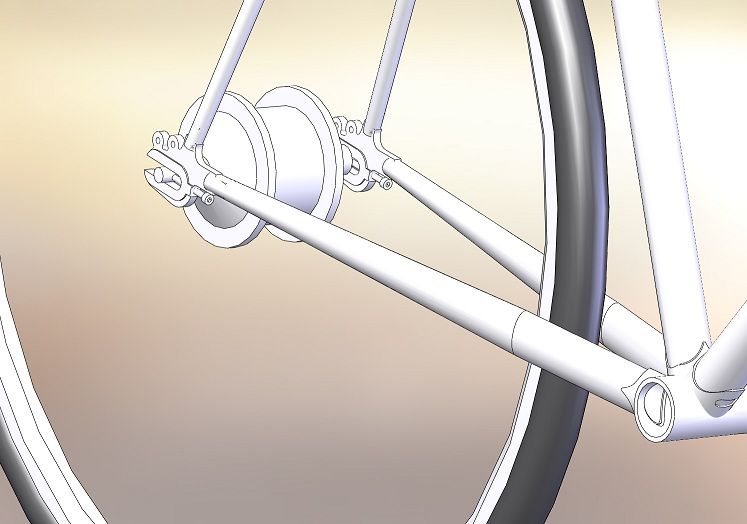
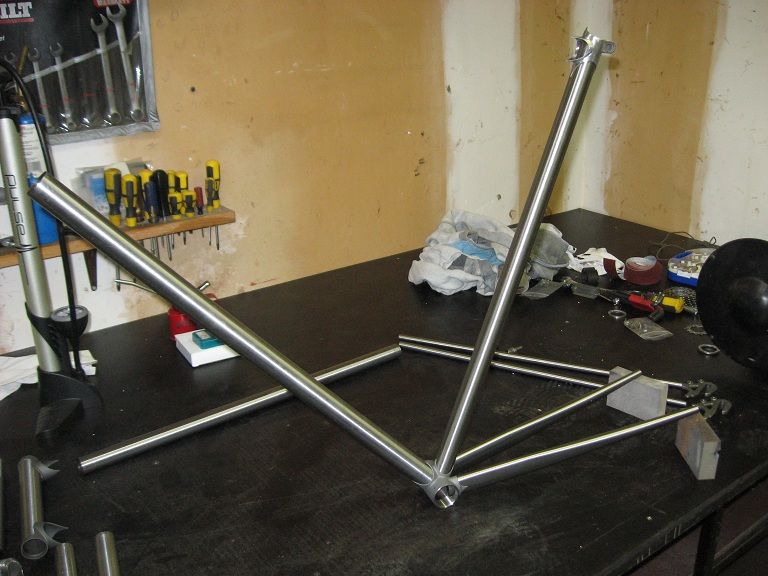
There is no need to lubricate the belts on the Gates system so it would be much nicer to handle...but the issue is that the belts cannot be split like a chain, and so you need to have a way of splitting the rear triangle to fit it all in. There are a few ways of doing this but the least invasive is to put a joint in the seat stay like so, and this is probably what I will be doing. I may put this in anyway so I can go down the belt drive path later even if I don't now...

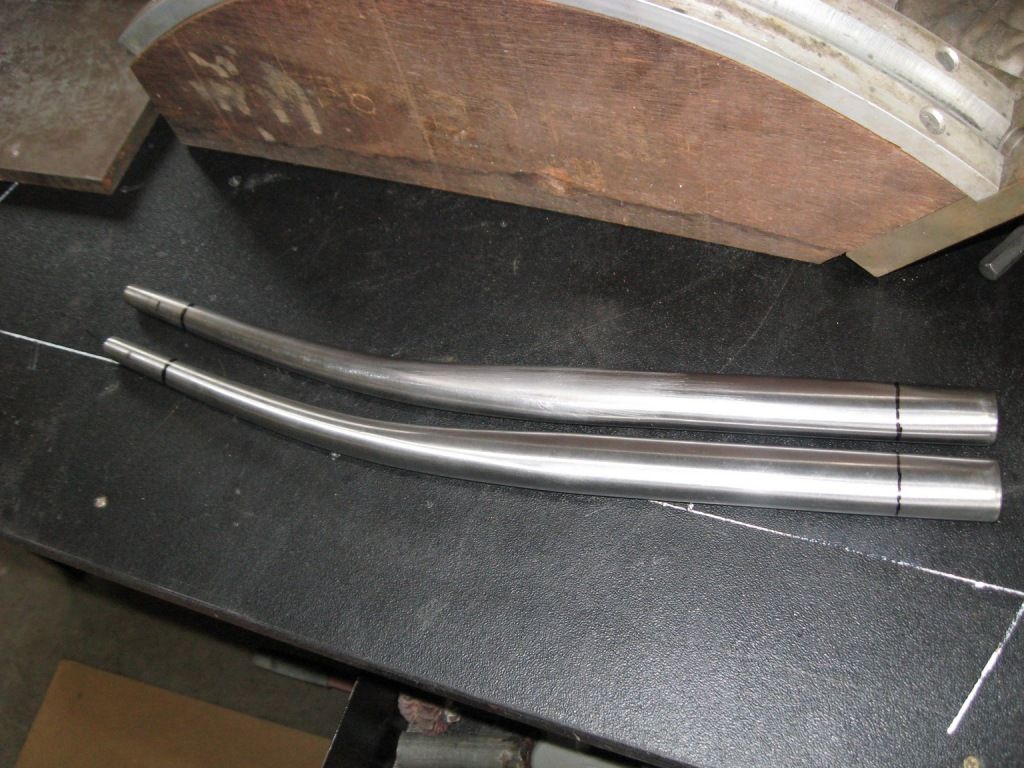
All of this has caused me to rethink the dropouts - for a start you need a pretty robust tensioning method for the belt which isn't that easy to get with the dropouts I ordered, plus it turned out that the angles on these dropouts are a fair way off optimal for my geometry. This could all be dealt with without too much issue, but I thought it would be nice to make up something proper for the task. I am not 100% happy with the design yet but I will first see what the manufacturing cost comes in at with this version that I have had quoted. I can always make them from scratch anyway as they are not too complicated...


Wednesday 9 May 2012

Zincbike; A Diversion.

This is Zincbike;


Zincbike is the bike I built when I discovered The Game, and it probably wasn't the correct frame to use to build a bike to go faster on, mostly because it is constructed entirely of steam pipe and lead. It was however very cheap and the correct 63cm size for my lengthy frame. As it is my daily commuter I have grown very fond of Zincbike over the many miles we have traveled together, which is kind of a shame as I intend to use all the bits from this bike in the new frame... this is due to the many shortcomings of this frame, but still.

At one time it was an 80's Avanti 10 speed, but I have added a Shimano Alfine 8 speed on 700c wheels, various handlebars, a Brooks saddle, and most important of all I had the frame zinc plated. On the face of it this was to keep the frame well protected for my all weather commutes, but in reality it was the start of my mission to apply every diverse protective coating known to mankind to as many bikes as possible.

Now, I am a big fan of internal hub gears (currently I have 4 bikes with geared hubs and only one with nasty nasty derailleurs), and the Alfine is a lovely bit of kit. However I have noticed the shifting has got a bit sticky recently, and the wheel feels a little rough when turned by hand. This is understandable as I have done somewhere between 3000 - 4000 kms on this hub and have not touched it - it is probably due for some loving.

The font of all things "the internet" comes to my aid and tells me that an oil bath is the solution to all the worlds problems. It also tells me I am a fool to use 100 quids worth of dead dinosaur which is the cost of the Shimano factory kit, and to just use ATF fluid, of which I have some literage in my garage...

So off to the garage and a short time later;


Interestingly things look completely mint, and while I was taking off the shifter mechanism I saw it was not seated exactly right. At this point I decided to simply stick it all back together with some new grease in the bearings and see what gives...

The result...? It feels a lot smoother and definitely more free, but has gotten slightly noisier while coasting in certain gears. Hmm, I will put this down to the grease having yet to distribute itself evenly and wait a few kms. Maybe the oil bath is on the cards after all....

Saturday 5 May 2012

Machinery time

Today I have reached a major milestone in this project, and in fact a major milestone in my life, for I have purchased my very own lathe, and what a beauty she is;


I have wanted a lathe forever, but it is only due to the sale of my beloved Fiat X1/9 that I have had the space and the funds to achieve this.

According to my research the lathe is at least 70 years old and so achieves several of my other goals in life; to be old, grey and shagged. I am pretty sure it would not satisfy the needs of my new hero, but to a man of simple tastes and limited skills (me), it will do just fine. I will use this to make bits for my frame jig, and probably a few actual frame bits as well.

I also bought this massive beast as well;


I can probably start an antipodean branch of the British Science Museum soon at this rate. Actually I have been to the Science Museum a couple of times, and there has been a quite irritating tendency towards whizz bang interactive computer displays, obviously in an effort to allow modern children to utilise their 20 second attention span and still learn something. I cannot abide this nonsense, give me a vintage wool baling machine in a dusty glass case any day, I can drool over that crap for hours. Clearly I am in my element here.

So on the actual frame building front I have laid out the frame geometry on my workbench so I can check the angles, and started mitering the tubes. I have discovered that this is so far a relatively simple task as long as you take your time, although I have yet to miter both ends of one tube so there is plenty of scope and time for me to bollox it up.

Laid out to check I have all the bits right;


This one was simply a fantasy exercise, so I can make the bicycle equivalent of vroom vroom noises, a quiet hour passed gazing at this, the wide vistas of my imagination taking me effortlessly over high mountain passes... it was only the growing patch of drool on my chest that snapped me out of it;


And finally at the bottom left is my very first mitered joint, exciting stuff I know.


So this week the focus will be on getting jiggy with it, I am gagging let me tell you.