Showing posts with label Gates belt drive. Show all posts

Saturday, 16 February 2013

A wild Bicycle appears

Having done nothing for a month, the tables have turned and I am now flying through the work with amazing speed, meaning the frame is basically complete except for the brake bridge, chainstay bridge and the brazons. I have decided not to split the seat stay for the belt drive now for a few reasons, but mostly because it would have stopped the momentum I have built up...

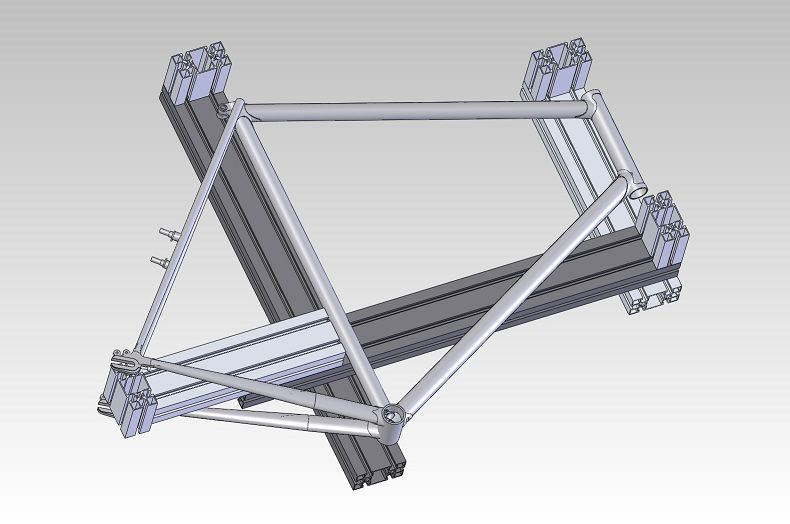
One thing I did this week was to check the frame geometry against the Surly, and surprisingly the two frames are almost exactly the same apart from the top tube height, the Surly being 1cm lower. This is quite pleasing, an hopefully means that I made the right decisions when I designed this frame.


Sorting the seat stays
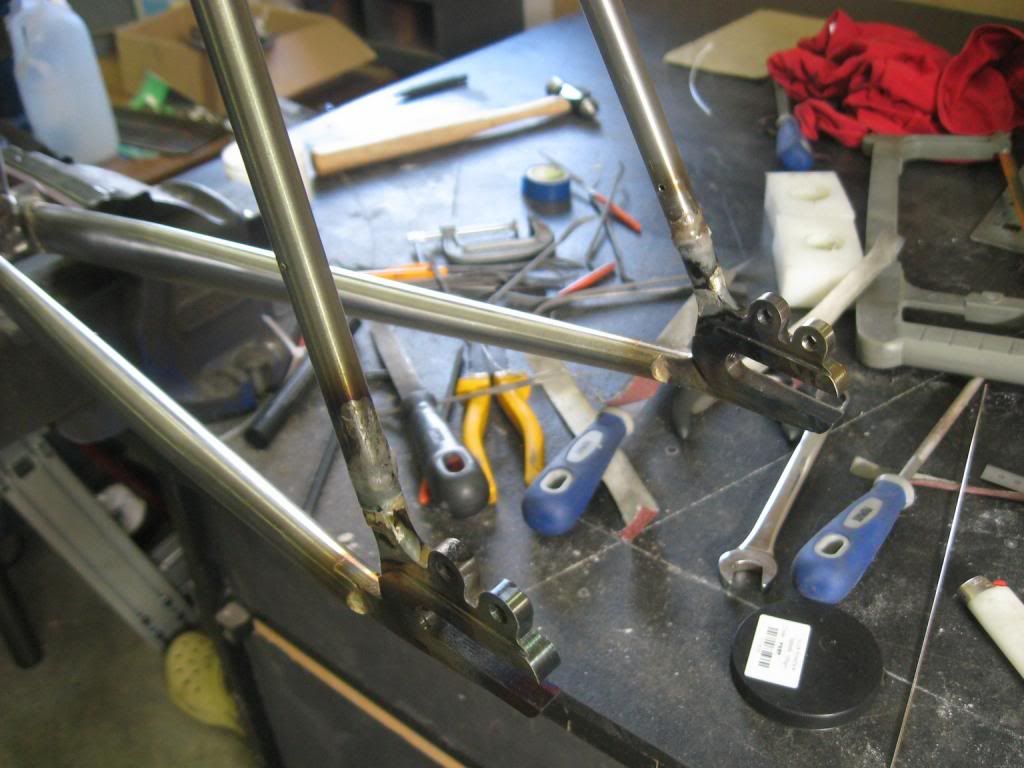
Brazing the bottom of the seat stays
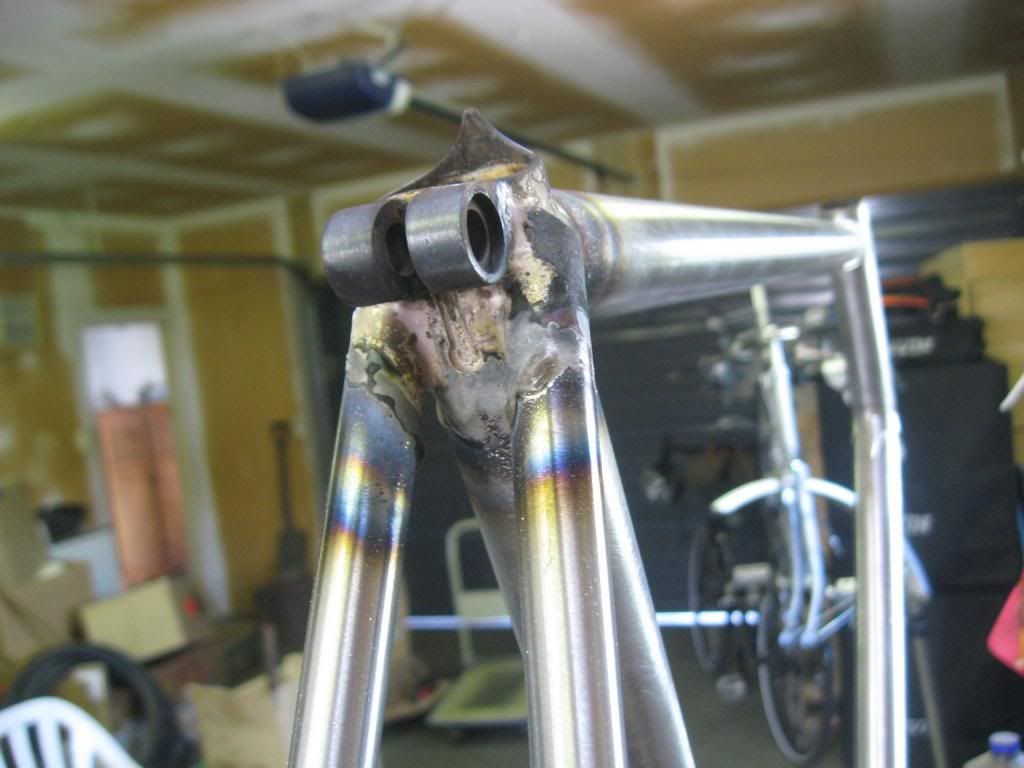
Brazing the top of the seat stays
Pretty much done :-)
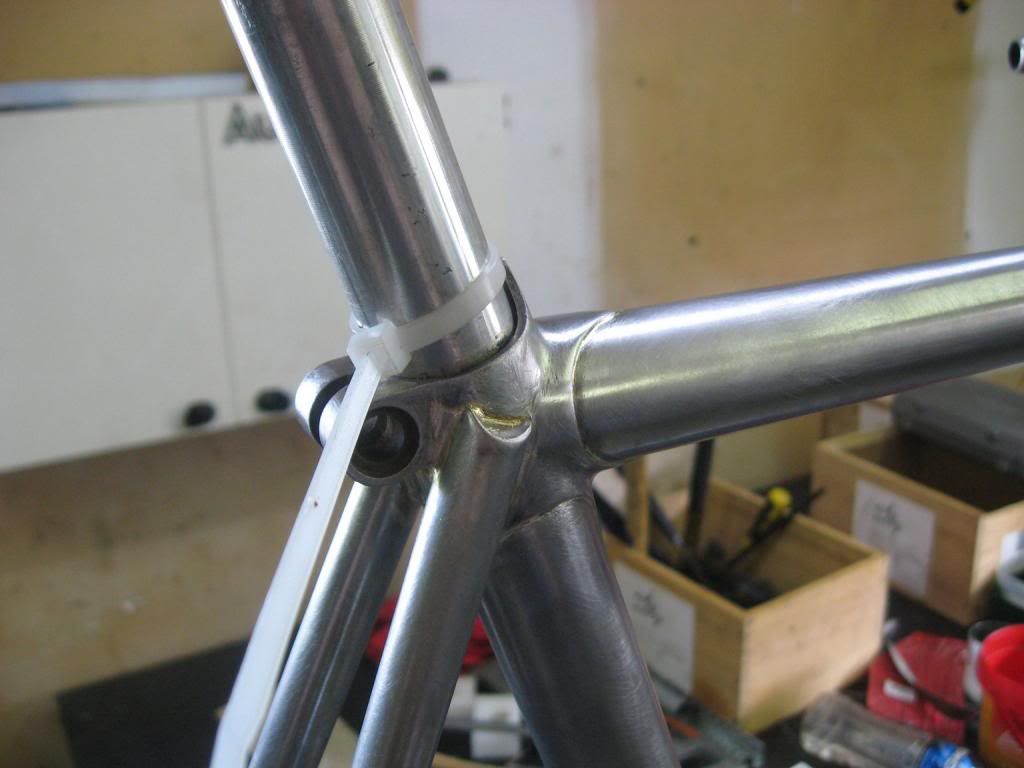
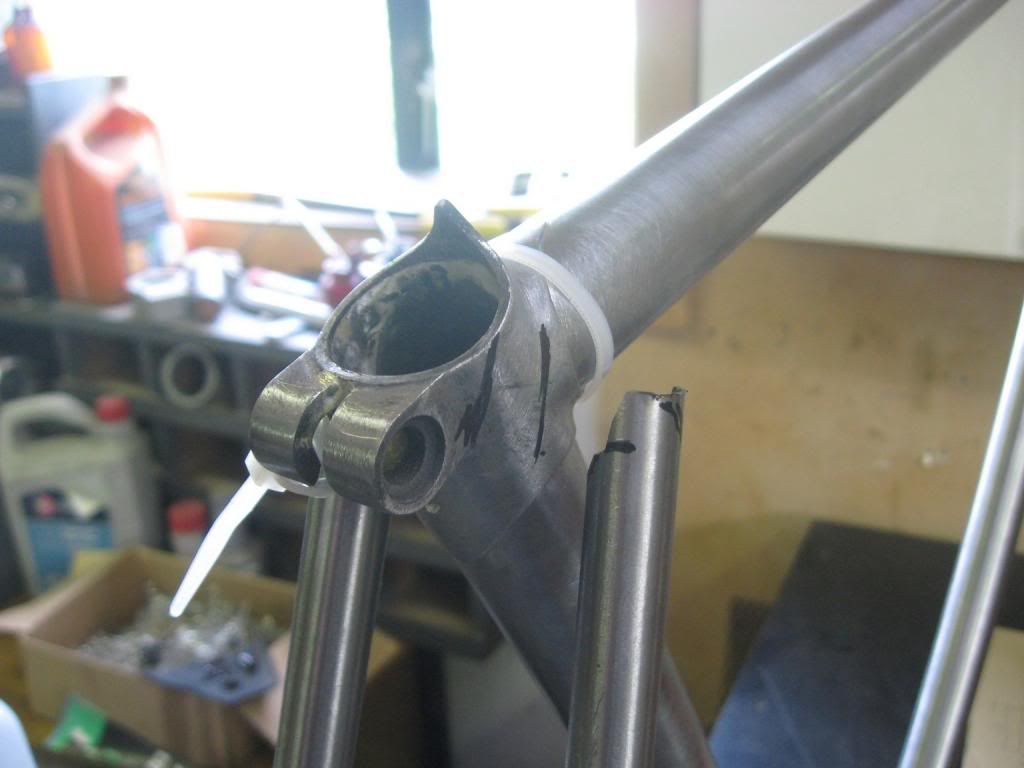
Mostly cleaned up - I decided to just keep things simple with the top of the seat stays and replicate what I have done with the dropout joints.
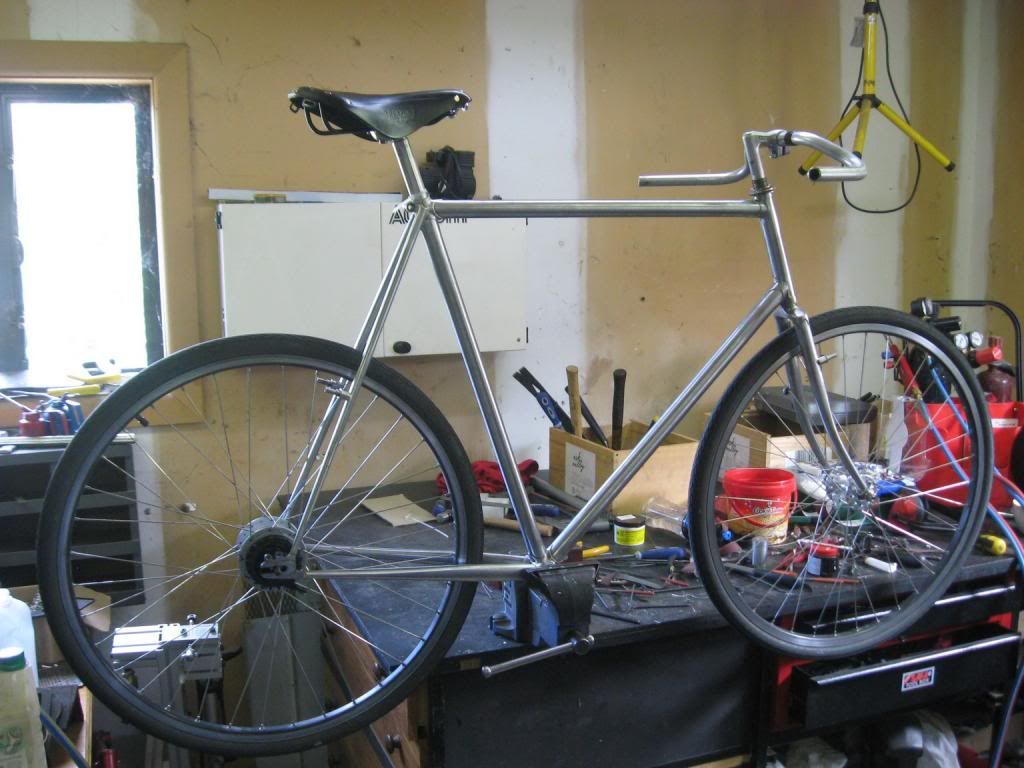
I got so excited I decided to mock it up - OMG a wild bicycle appears!
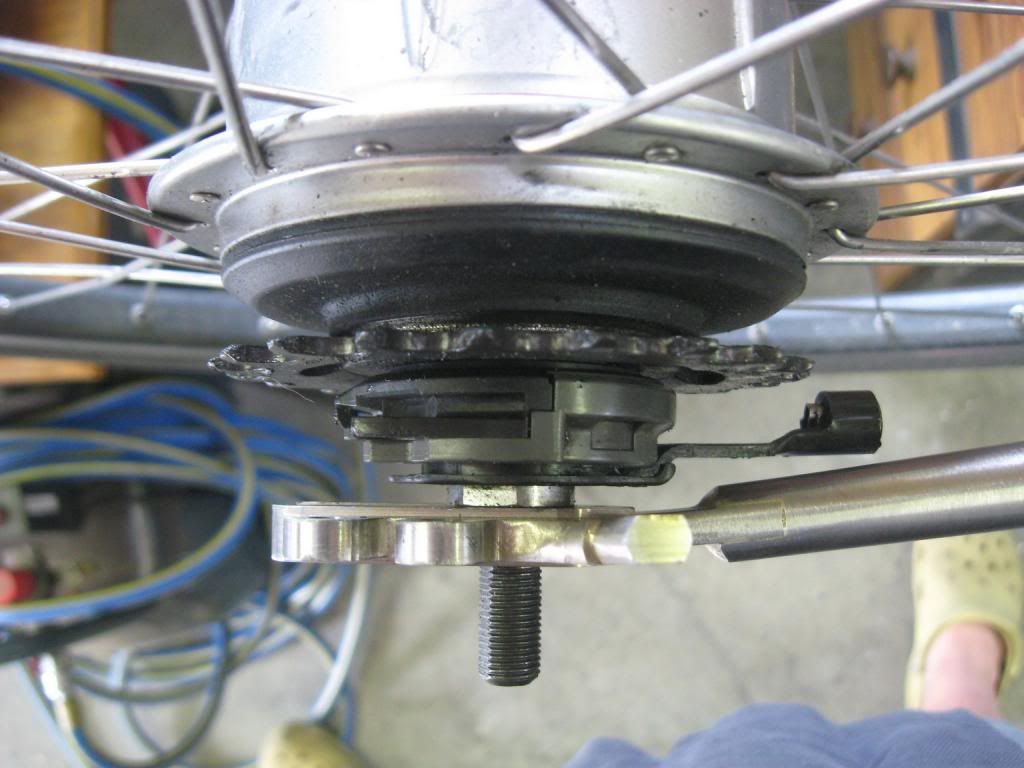
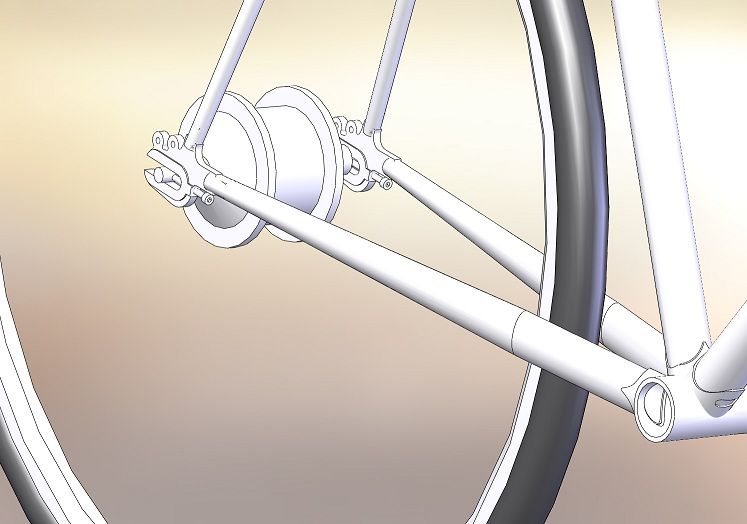
Plenty of room for the Alfine mechanism
Still some fine cleanup work to do on all the lugs...
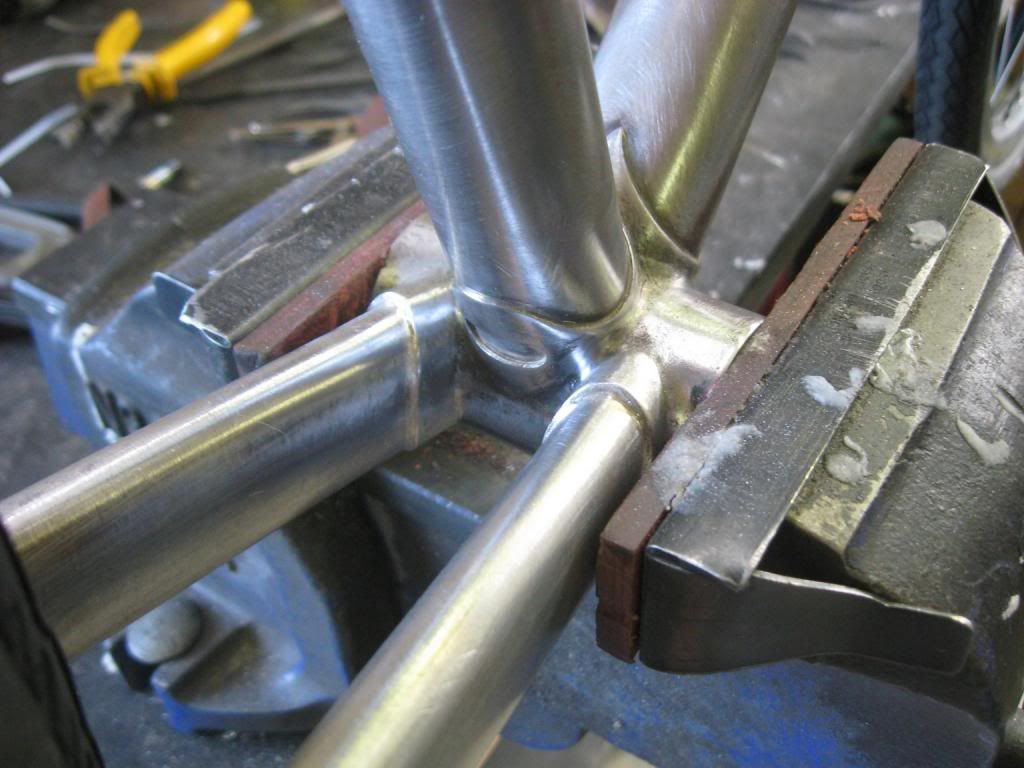
A recently brazed bottom bracket.

As I was so into the actual making I failed to take a lot of pics and did not document some of the important things that happened. One of these was cold setting the frame. After I did the head tube to down tube joint I pulled it about a bit with a long bit of pipe to make sure the angles were still the same after welding. I also did this once that assembly had been brazed into the seat tube/bottom bracket assembly. This is to make sure there are as few pre-stresses as possible in the finished frame, which would make the chances of it pulling things a bit wonky much greater.

--------------------------------------------------------------------------------

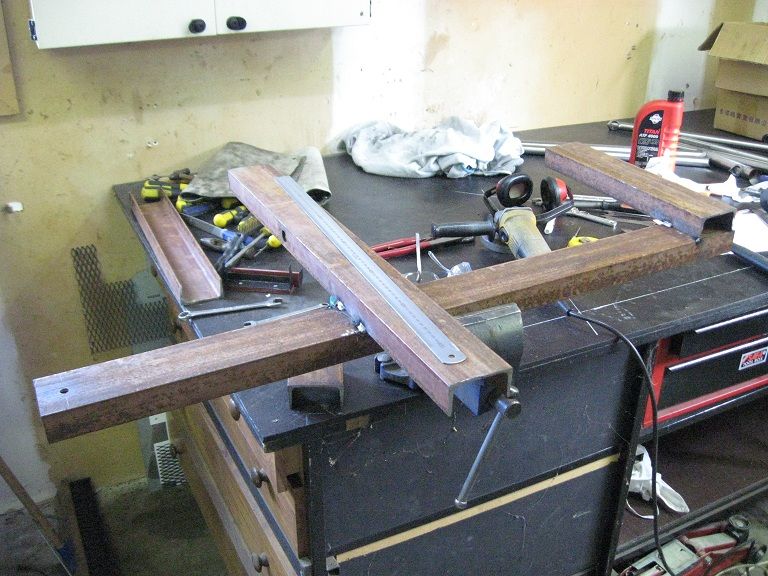
Having done most of the brazing on the frame, it is worth making a few notes on how the jig actually performed. Overall it does the job pretty well, but there are a few things that were less than satisfactory;

 - Generally I did the brazing in place on the jig, and one thing I noticed is that the big chunks of brass absorb quite a lot of heat. I kind of expected this to happen, but it made getting enough heat into the joint problematic at times.

 - Access to the side of the joint close to the jig was difficult, but because it tended to be the last bit you did things were already up to heat, so were still relatively easy to do. Whether brazing the nearside and then the farside of every joint is a good thing for making a totally straight frame is a question, but I tried to keep the brazing start points balanced where I could.

 - Once I had the main triangle and chainstays in place it was virtually impossible to remove the frame from the jig - I removed the fitting that holds the top of the seat tube, but even then it was hard. I will probably change things to improve this for the next frame.

Overall it worked pretty well though; 7 out of 10, should pay more attention in class. Story of my life really.


The lug brazing itself I am not 100% happy with to be honest, maybe I am being too hard on myself, but I felt I was getting things hotter than I really wanted in my efforts to get silver to wick into some of the joints. The simple ones with essentially the same pipe/lug material thicknesses were ok (the head tube joints for instance), the dropout joints were not too bad either, but the ones with complicated geometry and a long wicking path were pretty stressful to achieve; the seat lug, fork crown, chainstays into bottom bracket.

I think I have enough silver in there for it to not be a problem functionally, but the bit of me that wants each joint to be a thing of total beauty created with a zen like sense of competency and completeness is displeased. Still, it is my first frame, and it is all about the learning isn't it?

Anyway, soon I shall pop out soon to the ever helpful Bob, and we shall do the prep type work ie cleaning up the bottom bracket threads, reaming the seat tube, reaming the head tube and seating the fork crown bearing race.

Sunday, 13 May 2012

Jiggy wit it

The jig is proving somewhat problematic...

Not being the sort of man to spunk actual cash on the real thing when I can get a reasonably functional facsimile by doing it myself, I am going to build my own jig to hold framey things in place. My first idea was to make something up out of bits of not too heavy structural steel - I already own a MIG welder and so throwing something together should be a doddle. To this end I purchased a length of second hand 80x40mm channel (probably the start of my failure right there as it looked as though it had been salvaged from a beach somewhere, and prior to that had been coated with some form of rust preventative substance that could only have been sourced from a 1980's Italian car factory). Adding to my woes was that the channel web was not very flat at all, in fact 'ribbed for pleasure' was the phrase that came to mind. Certainly good for preventing conception anyway, I should have got wood.

An hour or so on Saturday morning was spent creating this;


As soon as I started marking out the centerlines of the frame and such, it became immediately apparent that this just wasn't going to be good enough, a finger push was enough to twist the frame a few mm out of whack. I could brace everything with more steel but it is already a heavy little bugger. This, coupled with the actual impossibility of getting the bits even roughly flat to each other in the first place due the built in Mariana trench on the steel meant I needed to come up with something better.

Now, I have recently designed a test rig for one of the local tech companies and the basic frame of the rig was made out of stuff called Minitec. Using this can get kind of expensive but it is an extremely flexible way of building framework for things - proper jigs commonly use very similar stuff, although it is usually their own custom profile.

Sod the cost I said to myself, it is clearly the way forward... and in a trice I had come up with this;


Actually I came up with something very similar to that pic, but then I found this, which caused some tweaking to take place. Sincerest form of flattery and all that...

Anyways, tomorrow I will get a quote from the local supplier for the bits that I need, and assuming I need not sell a kidney to pay for it I think this will be the way forward. It certainly simplifies manufacture of the other bits that actually hold the frame, so we shall see.

In other news, these last few weeks I have been pondering using a Gates belt drive with the Alfine when it gets put into the frame. This makes a lot of sense, particularly after a blowout I had a week or so ago, the fixing of which left my hands looking like I had lost a contact lens while inspecting the inside of an oil tanker. This episode eventually resulted in some quite fetching Ramboesque face camo so not all bad really.

There is no need to lubricate the belts on the Gates system so it would be much nicer to handle...but the issue is that the belts cannot be split like a chain, and so you need to have a way of splitting the rear triangle to fit it all in. There are a few ways of doing this but the least invasive is to put a joint in the seat stay like so, and this is probably what I will be doing. I may put this in anyway so I can go down the belt drive path later even if I don't now...

All of this has caused me to rethink the dropouts - for a start you need a pretty robust tensioning method for the belt which isn't that easy to get with the dropouts I ordered, plus it turned out that the angles on these dropouts are a fair way off optimal for my geometry. This could all be dealt with without too much issue, but I thought it would be nice to make up something proper for the task. I am not 100% happy with the design yet but I will first see what the manufacturing cost comes in at with this version that I have had quoted. I can always make them from scratch anyway as they are not too complicated...